Ziewnic Inverter Wi-Fi App Setup Guide
Updated 7 September 2026 · By SolarNevs Research Desk, Dealer surveys + verified sources · 2 sources · Method ↗
Key Takeaways
- The Ziewnic Wifi Plug Pro datalogger typically uses '12345678' as its default Wi-Fi AP password for initial setup, though some third-party dongles may vary.
- Always connect the datalogger to a 2.4 GHz home Wi-Fi network; 5 GHz networks are not supported.
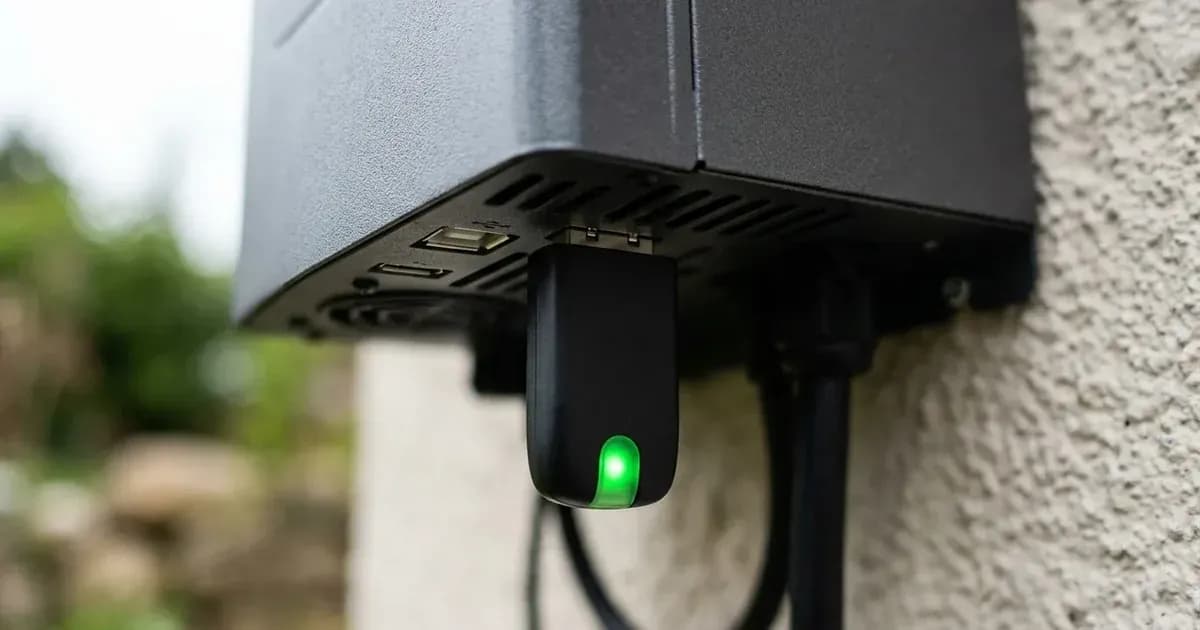
- Ensure the datalogger is securely plugged into the inverter's communication port and its power LED is solid before configuration.
- Exercise extreme caution when wiring custom BMS cables, as incorrect pinouts can damage battery communication circuits. Always disconnect all AC, DC, and battery power sources to the inverter before connecting or disconnecting any cables, and wait at least 5 minutes for internal capacitors to discharge. Failure to do so can result in lethal electric shock, severe burns from short circuits, or damage to equipment.
How to Set Up Your Ziewnic Inverter Wi-Fi App?
Setting up the Wi-Fi monitoring for your Ziewnic inverter allows you to track system performance, view energy data, and receive alerts remotely. The process involves connecting a Wi-Fi datalogger to your inverter and configuring it through a smartphone app. The most common cause of setup issues is an incorrect Wi-Fi password or attempting to connect to a 5 GHz network. The first step is to ensure your physical datalogger is correctly installed and powered.
Diagnosis
To troubleshoot Wi-Fi app setup issues, follow these steps:
- Check Datalogger Power: Verify the Wifi Plug Pro or internal Wi-Fi module is receiving power. The
PWRLED on the Wifi Plug Pro should illuminate solid once plugged into the inverter's communication port. If the LED is off, ensure the datalogger is fully seated and the inverter is powered on. - Scan for Datalogger AP: On your smartphone, go to Wi-Fi settings and scan for available networks. Look for an SSID matching the Wi-Fi module's Part Number (PN), often starting with
WIFI_PN...orAP_.... If this network does not appear, the datalogger may not be broadcasting its access point, indicating a power or hardware issue. - Verify Home Wi-Fi Band: Confirm that your home Wi-Fi router is broadcasting a 2.4 GHz network. The Ziewnic Wi-Fi datalogger does not support 5 GHz networks. If your router broadcasts both, ensure you select the 2.4 GHz option during configuration.
- Check Cloud Sync Status: After configuration, the
NETandSRVLEDs on the datalogger should illuminate solid, and a Wi-Fi icon on the inverter's LCD should also be solid. If these indicators are flashing or off, the datalogger is not successfully communicating with the cloud server.
Cause/fix table
Symptom detail | Likely cause | Fix |
|---|---|---|
Datalogger | Datalogger not properly connected or inverter not powered | Ensure Wifi Plug Pro is fully inserted into the inverter's communication port and the inverter is on. |
Cannot find datalogger's Wi-Fi network (SSID) on phone | Datalogger not broadcasting its access point | Check |
Cannot connect to datalogger's Wi-Fi network | Incorrect default AP password entered | Enter the default password |
Datalogger fails to connect to home Wi-Fi | Attempting to connect to a 5 GHz network | Select your home's 2.4 GHz Wi-Fi network. The datalogger does not support 5 GHz. |
| Datalogger not connecting to cloud server | Verify home Wi-Fi password is correct. Check internet connectivity of your home router. Ensure no firewall blocks the datalogger. |
Inverter data not appearing in app | Incorrect app selected or account not registered | Use "ZIEWNIC Inverter" or "SmartESS" for most models. For Lenox series, use "Solarman Smart" or "Solarman Business". |
Ziewnic Inverter Wi-Fi App Setup Procedure
Setting up your Ziewnic inverter for Wi-Fi monitoring involves a few key steps, from physically connecting the datalogger to configuring it with your home network. This guide covers the process for most Ziewnic inverters that use the external Wifi Plug Pro datalogger or similar built-in Wi-Fi modules. For a broader overview of inverter monitoring, see our inverter Wi-Fi monitoring setup guide.
1. Physical Datalogger Connection
The first step is to securely connect the Wi-Fi datalogger to your Ziewnic inverter. Before proceeding, ensure all AC, DC, and battery power sources to the inverter are completely disconnected, and wait at least 5 minutes for internal capacitors to discharge. Failure to do so can result in lethal electric shock, severe burns from short circuits, or damage to equipment.
- Locate the Communication Port: Find the designated 4-pin aviation or DB9/RS232/RS485 communication port at the bottom of your inverter. For external dataloggers like the Wifi Plug Pro, this is where it will connect.
- Plug In the Datalogger: Carefully insert the Wifi Plug Pro or Wi-Fi module into the port.
- Secure the Connection: Fasten any locking screw collar to ensure a stable connection.
- Restore Power: Re-connect the battery/AC supplies and switch the inverter back on before checking the datalogger LEDs.
- Verify Power: Check that the power LED (
PWR) on the datalogger illuminates solid, indicating it is receiving power from the inverter.
2. App Installation and Account Creation
Next, install the appropriate monitoring app on your smartphone and create an account.
- Download the App: Download the "ZIEWNIC Inverter" or "SmartESS" app from the Google Play Store or Apple App Store. For Lenox series inverters, use "Solarman Smart" or "Solarman Business" for monitoring. You can compare these with other inverter monitoring apps.
- Register an Account: Open the app and register a new account using a valid email address. You will typically be prompted to fill in required information and scan the Wi-Fi module's Part Number (PN) during registration. Tap "Register" to complete the process.
3. Direct Smartphone Connection to Datalogger AP
Your smartphone needs to connect directly to the datalogger's temporary Wi-Fi access point (AP) for initial configuration.
- Access Smartphone Wi-Fi Settings: Go to your smartphone's Wi-Fi settings.
- Scan for Datalogger Network: Scan for available Wi-Fi networks. You should see a network named after the Wi-Fi module's Part Number (PN), such as
WIFI_PN...orAP_.... - Connect to Datalogger AP: Select this network and enter the default password: '12345678'. (Note: some third-party aftermarket dongles distributed by regional dealers in Pakistan may use '123456789' or an open AP.)
4. Home Router 2.4 GHz Network Assignment
Now, you will configure the datalogger to connect to your home Wi-Fi network.
- Return to the App: Go back to the Ziewnic monitoring app.
- Navigate to Wi-Fi Configuration: Open the "Wi-Fi Config" or "Network Setting" page within the app.
- Select Home Wi-Fi: From the list of available networks, select your home Wi-Fi SSID. Crucially, this must be a 2.4 GHz band network, as 5 GHz is unsupported by the datalogger.
- Enter Password and Confirm: Enter your home Wi-Fi password and tap "Confirm" or "Save" to apply the settings.
5. Cloud Sync Verification
The final step is to verify that the datalogger has successfully connected to the cloud server for remote monitoring.
- Module Reboot: The Wi-Fi module will reboot and attempt to connect to the cloud server.
- Check Status LEDs: The
NETandSRVLEDs on the datalogger should illuminate solid. - Inverter LCD Icon: A Wi-Fi icon on your inverter's LCD display should also become solid, indicating that remote monitoring is active.
BMS Communication Port and RJ45 Pin Assignment
For Ziewnic inverters, particularly Voltronic-platform Ziewnic models (Axpert Ultra, Axpert Twin Premium +, Diamond, Max series), a dedicated BMS communication port is used. This port typically uses an RJ45 connector, and correct pin assignment is critical to avoid damage and ensure proper function. Lenox and Roux series use different platforms — confirm the pinout in your series manual before wiring. Always disconnect all AC, DC, and battery power sources to the inverter before connecting or disconnecting any cables, and wait at least 5 minutes for internal capacitors to discharge. Failure to do so can result in lethal electric shock, severe burns from short circuits, or damage to equipment.
When connecting lithium battery packs like Ziewnic Z-BOX, Li-Wall V2, Pylontech, or other compatible brands, you must use a custom RJ45 cable that matches the inverter's pin assignment. For an example of specific pinout details, refer to a Dyness BMS alarm and cable pinout guide.
The pin assignment for the BMS Communication Port is as follows:
PIN # | Definition / Signal Name | Hardware Function |
|---|---|---|
PIN 1 | RS232TX | RS232 Transmit data (display / debugging) |
PIN 2 | RS232RX | RS232 Receive data |
PIN 3 | RS485B | RS-485 Differential Data Line B (BMS Comm) |
PIN 4 | NC | No Connection |
PIN 5 | RS485A | RS-485 Differential Data Line A (BMS Comm) |
PIN 6 | CANH | Controller Area Network High (CAN-H) |
PIN 7 | CANL | Controller Area Network Low (CAN-L) |
PIN 8 | GND | Signal Ground |
The default RS485 baud rate for BMS communication is 9600 bps, which is typically set by DIP switch 1 being in the "ON" position.
Wiring Caution: It is crucial to understand that direct pass-through Ethernet cables should not be used without verifying the correct pin assignments. Pins 1 and 2 carry RS232 voltages, which can damage battery BMS communication circuits if incorrectly connected to RS485 or CAN pins. Always consult your battery's manual for its specific pinout requirements and ensure your custom cable matches both the inverter and battery specifications.
Safety: Always Disconnect Power First
Working with solar inverters and battery systems involves high voltages and currents. Always prioritize safety.
- Disconnect All Power: Before physically connecting or disconnecting any cables, especially the Wi-Fi datalogger or BMS communication cables, ensure that all AC, DC, and battery power sources to the inverter are completely disconnected, and wait at least 5 minutes for internal capacitors to discharge. This includes turning off solar PV breakers, battery disconnects, and AC grid input. Failure to do so can result in lethal electric shock, severe burns from short circuits, or damage to equipment.
- Internal Capacitor Discharge: High-voltage DC bus capacitors inside the inverter store significant electrical charge. Wait at least 5 minutes after disconnecting all solar PV, battery DC, and AC grid supplies before removing enclosure panels or servicing terminal blocks.
- Environmental Placement: Ziewnic inverters have specific IP ratings. IP21 rated models (e.g., Diamond II 6G, Axpert Ultra, Max Series, Roux Series) must be mounted indoors in a clean, dry, and well-ventilated area, protected from rain and direct water spray. IP65 rated models (Lenox series) are suitable for outdoor installation.
- BMS Cable Verification: When creating or using custom RJ45 cables for BMS communication, double-check the pinout against both your inverter and battery manuals. Incorrect wiring can lead to component damage.
When to call a technician instead
While many Wi-Fi setup issues can be resolved with the steps above, some problems require professional intervention.
- Persistent Datalogger Failure: If the Wifi Plug Pro or internal Wi-Fi module does not power on, broadcast its AP, or connect to the cloud despite following all troubleshooting steps, it may indicate a hardware fault.
- Inverter Communication Port Damage: If the inverter's communication port appears physically damaged, or if other communication methods (like USB to PC) also fail, a service center visit is likely needed.
- BMS Communication Errors: If you have correctly wired a custom BMS cable and selected the appropriate battery type in Program 05 (e.g.,
PYLorLib), but still experience a BMS communication warning (see the inverter error code glossary), there might be an internal inverter fault or a BMS issue with the battery itself. - Warranty Concerns: Attempting internal repairs on the inverter will void its warranty. Ziewnic offers a 5-year PCBA replacement warranty on flagship hybrid lines (Lenox) and standard 3 to 5-year warranties on retail models. For any issue beyond simple cable connections or app settings, contact Ziewnic's authorized service centers in Karachi or Lahore. Internal component failures (e.g., Fault 08, 09, 53, 57) are not field-serviceable and require factory-certified repair.
Still showing the fault? Book a technician
If the steps above did not clear it, tell us the inverter or battery and the exact code. We pass it to a technician who covers your city; visit charges are quoted before they come.
How this pays for the site: the technician or verifier pays SolarNevs a fixed introduction fee. Nobody pays to be recommended, and you are free to use our free guides instead.
Frequently asked questions
What is the default Wi-Fi password for the Ziewnic datalogger?
The default Wi-Fi AP password for the Ziewnic Wifi Plug Pro datalogger is '12345678'. Note that some third-party aftermarket dongles may use '123456789' or an open access point. This password is used to connect your smartphone directly to the datalogger's access point during initial setup.
Which app should I use for my Ziewnic inverter's Wi-Fi monitoring?
For most Ziewnic inverters, use the "ZIEWNIC Inverter" or "SmartESS" app. Lenox series inverters typically use "Solarman Smart" or "Solarman Business" for monitoring.
Can I connect my Ziewnic Wi-Fi datalogger to a 5 GHz network?
No, the Ziewnic Wi-Fi datalogger requires a 2.4 GHz Wi-Fi network for connection. It does not support 5 GHz networks.
What should I do if my Ziewnic Wi-Fi datalogger is not connecting to the internet?
If you need to reseat or reconnect the datalogger, always disconnect all AC, DC, and battery power sources to the inverter first, and wait at least 5 minutes for internal capacitors to discharge. Failure to do so can result in lethal electric shock, severe burns from short circuits, or damage to equipment, and attempting internal repairs will void your warranty. Then, restore power and re-check the LEDs.
What are the key pins for BMS communication on a Ziewnic inverter?
On Voltronic-platform Ziewnic models (Axpert Ultra, Axpert Twin Premium +, Diamond, Max series): PIN 3 (RS485B)/PIN 5 (RS485A) for RS485, PIN 6 (CANH)/PIN 7 (CANL) for CAN. Lenox and Roux series use different platforms — confirm the pinout in your series manual before wiring.
References
- Ziewnic Product Catalog — accessed 23 August 2026
- Axpert VM IV-4K6K-TWIN Off-grid Manual — accessed 23 August 2026
Related guides
More from inverter errors & fixes.