Sunsynk Connect Dongle: Wi-Fi Pairing and Plant Analytics Setup
Updated 6 September 2026 · By SolarNevs Research Desk, Dealer surveys + verified sources · 18 sources · Method ↗
Key Takeaways
- Sunsynk Dataloggers connect to the internet via either Wi-Fi or Ethernet; Ethernet takes precedence if both are connected.
- Only 2.4GHz Wi-Fi networks are supported for Datalogger connection.
- Specific firewall ports (TCP 80, 443; UDP 53, 123) must be open for the Datalogger to function correctly.
- The Sunsynk Connect App is required to connect a Datalogger to a new Wi-Fi network.
Connecting Your Sunsynk Datalogger to Wi-Fi and the Sunsynk Connect App
The Sunsynk Datalogger serves as the bridge between your inverter and the Sunsynk Connect monitoring platform, enabling remote access to plant analytics. To establish this connection, the Datalogger requires internet access, primarily achieved through Wi-Fi or Ethernet. For Wi-Fi setup, the Sunsynk Connect App is the primary tool for configuration.
Understanding Sunsynk Connect and Datalogger Operation
Sunsynk Connect provides remote monitoring capabilities, allowing users to track inverter performance, battery status, and energy flows via a web portal or mobile application. The Datalogger facilitates this by transmitting operational data from the inverter to the Sunsynk Connect platform. It can connect to the internet via either Wi-Fi or Ethernet, with Ethernet taking precedence if a cable is connected. Each inverter requiring monitoring within a plant must have its own Datalogger.
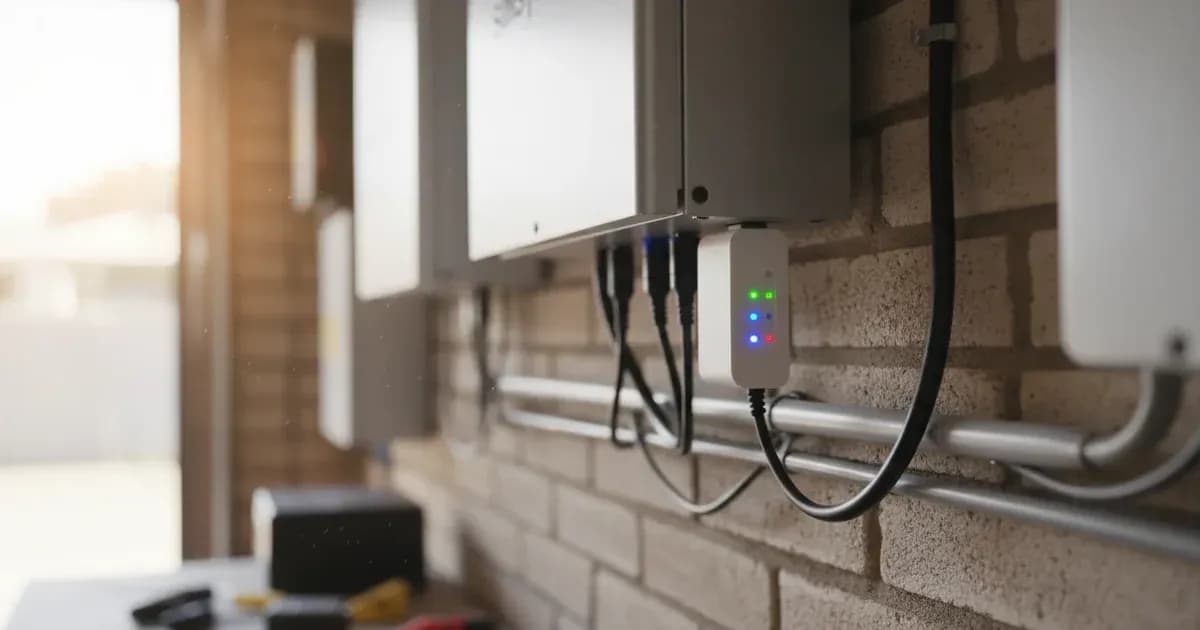
The Datalogger features LED indicators to communicate its status: a green light indicates the Datalogger is powered on, while a blue light signifies an active internet connection.
Datalogger Settings and Network Requirements
Proper configuration of your network and Datalogger settings is crucial for reliable data transmission. This includes ensuring the correct Wi-Fi frequency is used and that necessary firewall ports are open.
Setting / Parameter | Specification / Action | Technical Reference |
|---|---|---|
Required Firewall Ports | TCP 80, TCP 443, UDP 53, UDP 123 must be open on your firewall. | These ports are essential for HTTP/HTTPS, DNS, and NTP protocols, enabling the Datalogger to communicate with Sunsynk servers. |
Supported Wi-Fi Frequency | Only 2.4GHz Wi-Fi networks are supported. | If your Wi-Fi network is not displayed during the connection process, verify it is operating on the 2.4GHz band. |
Cellular Data Usage (typical) | Approximately 5-10MB per month. | For Dataloggers utilising a cellular connection, data consumption is generally low. |
Wi-Fi Network Setup | Use the Sunsynk Connect App to connect to a new Wi-Fi network. | The app provides the interface for configuring Wi-Fi credentials and connecting the Datalogger. |
Datalogger Connection Method | Connects via Wi-Fi or Ethernet; Ethernet takes precedence. | If both are available, the Datalogger will prioritise the wired Ethernet connection. |
Adding Multiple Inverters | Multiple inverters can be added to the same plant, each requiring its own Datalogger. | This allows for collective monitoring of several inverters within a single plant view. |
Unbinding Datalogger | Dataloggers can be unbound from a plant via the Sunsynk.net portal or the Sunsynk Connect mobile app. | This process is necessary if a Datalogger needs to be re-registered or moved to another plant. |
Troubleshooting Common Datalogger Issues
When setting up or maintaining your Sunsynk Datalogger, you may encounter specific error codes or symptoms. Understanding these can help in diagnosing and resolving connectivity problems.
Code/Symptom | Meaning | Fix Direction |
|---|---|---|
DNS Error | The Datalogger is unable to resolve the Sunsynk server address. | Check your router's DNS settings, ensuring they are set to automatic or use a public DNS server (e.g., 8.8.8.8). Verify firewall settings are not blocking DNS requests. |
Gateway Bound Error | The Datalogger is already registered to another plant or account. | The Datalogger must be unbound from its previous account before it can be registered to a new one. |
Set Fail Error | Occurs during Wi-Fi settings configuration. | This often indicates an incorrect Wi-Fi password, the network being out of range, or an unsupported Wi-Fi frequency (only 2.4GHz is supported). |
Datalogger shows green light only | The Datalogger is powered on but not connected to the internet. | Check the Wi-Fi signal strength, ensure the Ethernet cable is securely connected (if applicable), and review firewall settings. |
Datalogger shows no LED lights | Indicates a power issue with the Datalogger. | Confirm the Datalogger is correctly plugged into the inverter's communication port and that the inverter itself is powered on. |
Wi-Fi network not displayed | The network is hidden, operating on 5GHz, or too far from the Datalogger. | Ensure your network is visible, configured for 2.4GHz, and within the Datalogger's operational range. |
OBM Lora 223 W04 Error | Indicates a meter communication failure. | Inspect meter wiring and Modbus connections. Verify meter settings are correct and compatible. |
Unable to change settings remotely | Inverter model/firmware restrictions or critical settings. | Some inverter models or firmware versions restrict remote setting changes, or certain critical settings require local access. |
Unable to share or transfer plant | Incorrect user permissions or plant already linked to a master account. | Verify user permissions are adequate for sharing or transferring. If linked to a master account, specific procedures may apply. |
Installation Safety and Switchgear Requirements
While the Sunsynk Datalogger itself is a low-voltage communication device, its installation involves working near a grid-tied inverter, which handles high DC and AC voltages. Always prioritise safety during installation and maintenance.
- Isolation Procedure: Before connecting or disconnecting the Datalogger from the inverter, ensure the inverter is fully isolated. This involves:
- Switching off the AC mains supply breaker to the inverter.
- Switching off the AC output breaker from the inverter to the load.
- Switching off the DC isolator for the solar PV array.
- Switching off the DC isolator for the battery bank.
- Wait for the inverter's internal capacitors to discharge. Refer to your inverter's manual for the specific discharge time, typically a few minutes.
- Personal Protective Equipment (PPE): Always wear appropriate PPE, including insulated gloves, safety glasses, and non-conductive footwear, when working with or near electrical equipment.
- Authorised Personnel: Installation and maintenance of solar PV systems and inverters should only be performed by qualified and authorised technicians. Connecting the Datalogger, while seemingly simple, is part of a larger electrical system.
- Earthing: Ensure the inverter and associated electrical infrastructure are correctly earthed according to local electrical codes and standards.
What the published sources do not tell you
The available documentation provides essential information for connecting and troubleshooting Sunsynk Dataloggers. However, certain specific details and procedures are not explicitly covered:
- Datalogger Models and Specifications: The sources do not list specific models of Sunsynk Dataloggers (e.g., Wi-Fi dongle, Ethernet dongle, cellular dongle) or their detailed technical specifications such as physical dimensions, power consumption, or operating temperature ranges.
- RS485 Modbus Telemetry Details: While Modbus connections are mentioned in troubleshooting, there are no explicit details on the RS485 Modbus telemetry protocol, specific data points, or register maps for direct integration with other systems.
- Sunsynk Connect App Features: A comprehensive list of app features, interface details, or specific step-by-step setup instructions within the app for functions beyond Wi-Fi configuration are not provided.
- Multi-Inverter Communication Protocols: Beyond stating that multiple inverters can be added to a plant and each needs a Datalogger, the underlying communication protocols or specific setup for multi-inverter fleet monitoring (e.g., master/slave configurations, data aggregation methods) are not detailed.
- Physical Installation Guides: No step-by-step physical installation guides for the Datalogger or its connection to various inverter models are available.
- Firmware Update Procedures: The process for updating the Datalogger's firmware is not described in the provided articles.
Add a battery at a surveyed price
Installers quote supply and fitting of the battery on this page for your existing or new system.
How this pays for the site: installers pay SolarNevs a fixed introduction fee when we pass them a genuine enquiry. They cannot pay to appear higher, and our surveyed prices are published before any introduction. You can also take our dated price tables straight to any installer.
Frequently asked questions
What Wi-Fi frequency does the Sunsynk Datalogger support?
The Sunsynk Datalogger supports only the 2.4GHz Wi-Fi frequency. If your network is not displayed during connection, ensure it is operating on 2.4GHz and is not hidden.
What firewall ports are required for the Sunsynk Datalogger to function?
For correct operation, the Sunsynk Datalogger requires TCP ports 80 and 443, and UDP ports 53 and 123 to be open on your firewall. These ports are used for HTTP/HTTPS, DNS, and NTP services.
How much cellular data does a Sunsynk Datalogger typically use?
A cellular Sunsynk Datalogger typically uses a low amount of data, around 5-10MB per month. This usage is for transmitting operational data to the Sunsynk Connect platform.
What does a 'Gateway Bound' error indicate on a Sunsynk Datalogger?
A 'Gateway Bound' error means the Datalogger is already registered to another plant or account. To resolve this, the Datalogger must be unbound from its previous registration.
How can I connect my Sunsynk Datalogger to a new Wi-Fi network?
To connect your Sunsynk Datalogger to a new Wi-Fi network, you must use the Sunsynk Connect App. This application facilitates the configuration of Wi-Fi settings for the Datalogger.
References
- Sunsynk Support — accessed 29 August 2026
- Sunsynk Support — accessed 29 August 2026
- Sunsynk Support — accessed 29 August 2026
- Sunsynk Support — accessed 29 August 2026
- Sunsynk Support — accessed 29 August 2026
- Sunsynk Support — accessed 29 August 2026
- Sunsynk Support — accessed 29 August 2026
- Sunsynk Support — accessed 29 August 2026
- Sunsynk Support — accessed 29 August 2026
- Sunsynk Support — accessed 29 August 2026
- Sunsynk Support — accessed 29 August 2026
- Sunsynk Support — accessed 29 August 2026
- Sunsynk Support — accessed 29 August 2026
- Sunsynk Support — accessed 29 August 2026
- Sunsynk Support — accessed 29 August 2026
- Sunsynk Support — accessed 29 August 2026
- Sunsynk Support — accessed 29 August 2026
- Sunsynk Support — accessed 29 August 2026
Related guides
More from what to buy — and how not to get cheated.