Growatt Error 203: PV Isolation Low Fix and Morning Dew Triage
Updated 18 September 2026 · By SolarNevs Research Desk, Dealer surveys + verified sources · 2 sources · Method ↗
Key Takeaways
- Growatt Error 203 indicates low DC insulation resistance, where direct current leaks from solar modules or string wiring to the protective earth structure.
- In the UK climate, the most frequent cause is early morning dew or overnight rainfall bridging micro-fissures in external connectors before sunlight evaporates the dampness.
- Measuring insulation resistance requires isolating the inverter completely and verifying that resistance from both positive and negative conductors to ground exceeds 500 kΩ.
- Permanent isolation faults require isolating the DC array and having an installer replace degraded cables or water-damaged DC rotary isolator enclosures.
What is Growatt Error 203 and why does it trip?
When a Growatt inverter initiates its pre-generation self-test sequence, it performs a sensitive electrical insulation resistance measurement across the connected photovoltaic array. If the measured resistance between the live direct current conductors and earth falls below the mandatory safety threshold, the inverter halts generation, illuminates its red fault LED, and displays Error 203 on the screen.
This safety trip prevents dangerous touch voltages from appearing on the metal array mounting framework and protects against electrical fires caused by continuous direct current ground faults. For British homeowners and installers, detailed statutory earthing and wiring standards are set out in our UK solar electrical installation guide.
The occurrence pattern provides the critical diagnostic clue. If Error 203 appears strictly during early dawn hours or following heavy rain, but disappears once the morning sun warms the roof, the installation is suffering from condensation leakage. However, if Error 203 remains displayed throughout dry afternoons, a physical hardware defect—such as rodent damage, pinched insulation, or an unsealed isolator—is present.
Root causes of low PV isolation on Growatt inverters
Field investigations by solar technicians identify four primary mechanisms that trigger Error 203:
1. Morning condensation and environmental moisture
During cold British nights, moisture condenses on solar panel glass, module backsheets, and cable assemblies. If connectors have experienced minor weather seal degradation, dew creates a microscopic conductive moisture bridge between the live DC circuit and the earthed aluminum mounting frame. This generates temporary leakage current that trips the inverter during morning startup.
2. Water ingress into external enclosures
Rooftop DC rotary isolators and solar array junction boxes are exposed to driving rain and wind. If cable compression glands are improperly torqued, missing internal rubber gaskets, or installed entering from the top rather than the bottom of the enclosure, rainwater pools across internal terminals.
3. Mechanical cable chafing and insulation breakdown
Solar string cables expand and contract with seasonal temperature swings. If cables were installed without adequate support or resting directly against sharp slate edges, the outer protective insulation gradually wears away. Once copper conductors contact the metallic racking, an earth fault locks out generation.
4. Solar module physical damage
Hail impact, heavy snow loading, or thermal stress can cause hairline cracks in module glass or delamination of the rear protective Tedlar sheet. Water entering these fissures creates direct leakage paths into the cell matrix.
For systems linked with domestic battery banks or export schemes, maintaining isolation integrity is essential; see our battery storage fire safety guide and Smart Export Guarantee guide.
Diagnostic procedure: step-by-step isolation testing
Diagnosing Error 203 requires a systematic progression from observational tracking to physical instrument testing:
Diagnostic Stage | Inspection Focus | Expected Test Result | Corrective Action |
|---|---|---|---|
Time Tracking | Morning occurrence vs all-day persistence | Self-clears as array warms | Allow system to dry naturally if moisture-related |
Visual Inspection | Cables, MC4 connectors, and DC isolator boxes | Clean, dry, undamaged seals | Repair damaged components; ensure junction sealing |
Grounding Check | Inverter chassis and module framework | Solid mechanical bond to PE | Check that the panel housing is properly grounded |
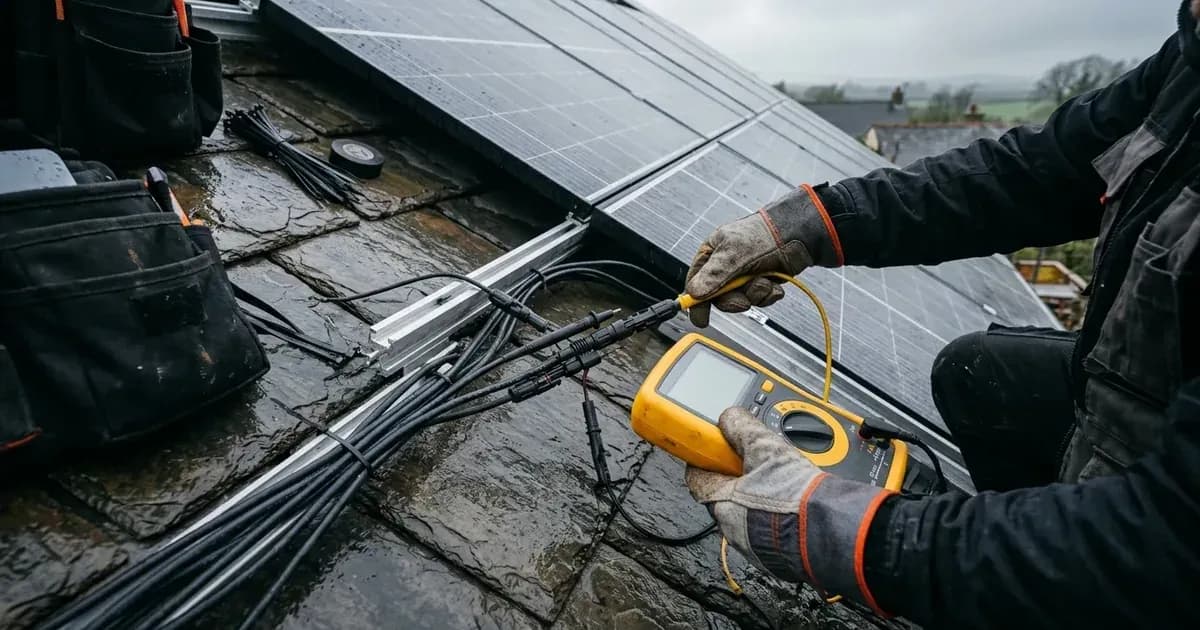
Megohmmeter Testing | DC string conductors (PV+ and PV-) to earth | Resistance greater than 500 kΩ | Isolate individual modules to locate defective string section |
Step 1: Track the timing of the alarm
Observe when Error 203 appears. If limited to mornings and clears later, the fault is moisture-related. Record the local ambient humidity and precipitation history to provide context for your service engineer.
Step 2: Perform a visual inspection of external DC components
With the system safely shut down, inspect visible rooftop and loft cabling. Look for sagging cables rubbing against roof tiles, discolored MC4 plugs showing signs of thermal distress, and condensation beads inside the transparent covers of external DC isolators.
Step 3: Measure insulation resistance with an approved meter
Qualified electricians use an insulation resistance tester to pinpoint the leak:
- Turn off the AC supply breaker and the inverter integrated DC isolator.
- Disconnect DC inputs from the inverter underside to isolate internal circuitry.
- Test insulation resistance between the positive DC string terminal and earth.
- Test insulation resistance between the negative DC string terminal and earth.
- In dry ambient conditions, both readings must measure greater than 500 kΩ.
- A reading below this threshold confirms that an active earth fault exists on that specific string.
Step 4: Verify protective earthing continuity
Confirm that the metallic array framework and inverter casing maintain an unbroken bond to the main electrical earthing terminal. After turning off, check that the panel housing is properly grounded to ensure earth fault currents trigger safety devices reliably.
For grid connection standards and inverter protection requirements, consult our micro-generator grid connection guide.
Safety: direct current ground fault hazards
Photovoltaic arrays generate high direct-current voltages whenever exposed to daylight. Working on systems experiencing an isolation breakdown requires strict adherence to electrical safety principles:
- DC shock hazard: When an isolation fault is present, the metallic mounting frame or broken cable may sit at full array voltage relative to ground. Touching metalwork while in contact with earth can result in fatal electrical shock.
- Never unplug DC connectors under load: DC arcs do not self-extinguish. Always isolate alternating current supplies and switch the rotary DC switch to OFF before disconnecting MC4 string leads.
- Meter protection: Never connect an insulation tester to an inverter while the DC plugs remain connected to the chassis. High test voltages will destroy internal input surge protection components.
When to contact an MCS-certified technician
Homeowners can monitor the inverter screen and observe whether Error 203 clears during dry sunny periods. However, physical inspection of rooftop arrays, opening electrical enclosures, and high-voltage insulation testing must only be performed by certified professionals with valid electrical qualifications.
You must escalate the fault to an MCS-certified technician under these circumstances:
- The error persists continuously: When Error 203 does not clear after several dry sunny hours, permanent insulation breakdown has occurred.
- Visible moisture inside isolators: If water is detected inside rotary switches or conduit fittings, the enclosure must be replaced and resealed.
- Low instrument readings: If insulation resistance tests return values below 500 kΩ, individual panels must be disconnected sequentially to isolate the failed component.
In case of persistent hardware failure where field insulation tests prove the solar array is sound, the only authorized path for repair is contacting the official Growatt Service Department at service@growatt.tech.
Frequently asked questions
What does Error 203 mean on a Growatt inverter?
Error 203 indicates PV isolation low, meaning the inverter detected insufficient electrical insulation resistance between the DC solar array conductors and earth. It frequently occurs during morning startup when dew creates temporary leakage paths.
What insulation resistance threshold does Growatt require?
Growatt requires an insulation resistance greater than 500 kΩ between the positive DC string conductor and ground, and between the negative conductor and ground, measured under dry test conditions.
Can rain or water ingress trigger Growatt Error 203?
Yes. Water ingress inside rooftop DC isolator enclosures, unsealed junction boxes, or damaged solar panel connectors creates a direct conductive path to the mounting frame, locking out inverter startup.
Will Growatt Error 203 clear automatically?
If the isolation fault is caused solely by surface condensation or damp morning air, the system will often clear automatically as sunlight warms the modules and evaporates the moisture.
References
- Growatt Technical Support: Error 203 PV Isolation Low Diagnostics — accessed 29 August 2026
- Growatt MOD XH BP Inverter Error Description and Triage Guide — accessed 29 August 2026
Related guides
More from inverter errors & fixes.