Victron SmartShunt and Lynx Distributor Modular DC Busbar Wiring Guide
Updated 6 September 2026 · By SolarNevs Research Desk, Dealer surveys + verified sources · 2 sources · Method ↗
Key Takeaways
- The SmartShunt functions as a battery monitor, while the Lynx Distributor manages positive DC power distribution.
- Correct wiring of the SmartShunt to the negative battery terminal and common negative busbar is critical for accurate current measurement.
- Configuration of SmartShunt settings, including 'Battery capacity' and 'Charged voltage', is performed using the VictronConnect app.
- All power sources must be isolated, and appropriate safety precautions followed before making high-current DC connections.
How to Wire Your Victron SmartShunt and Lynx Distributor
Wiring a Victron SmartShunt and Lynx Distributor involves establishing a robust and monitored DC power distribution system. This guide outlines the essential steps for connecting these components to ensure accurate battery monitoring and safe power distribution in your solar energy setup. The SmartShunt models, such as the SmartShunt 500A and SmartShunt 1000A, are designed to measure current and voltage, while the Lynx Distributor M8 and Lynx Distributor M10 provide fused connections for DC loads and chargers.
Understanding the Victron Modular DC Busbar System
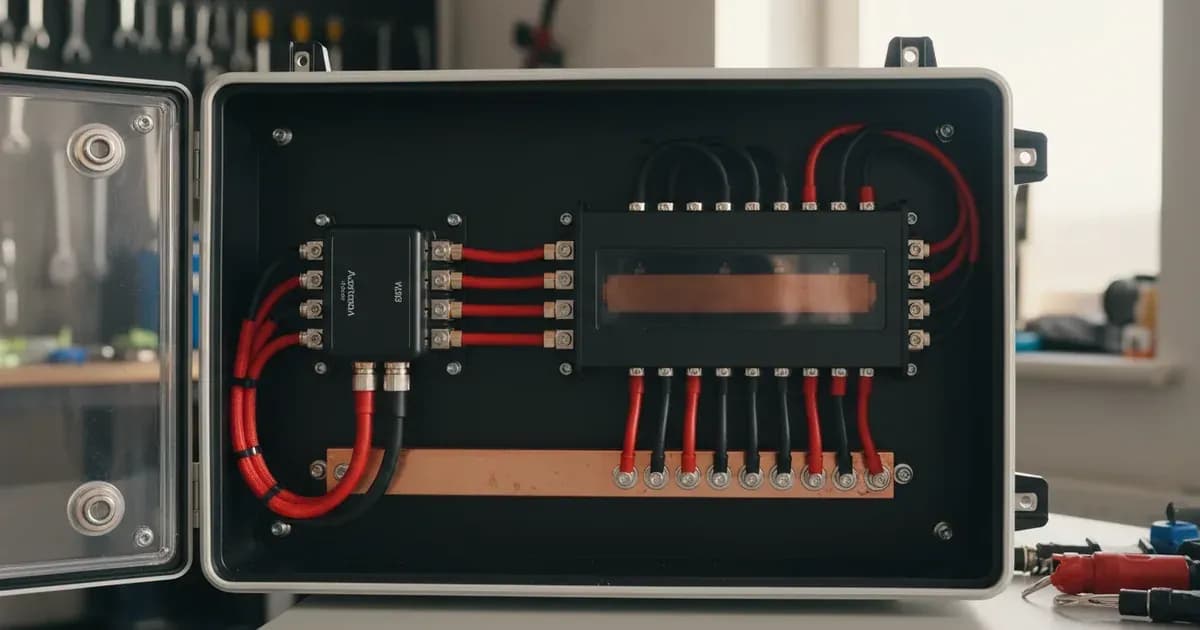
The Victron modular DC busbar system, often referred to as the "Lynx Distribution System," provides a structured approach to managing high-current DC connections. The SmartShunt acts as "The battery monitor" within this system, placed in the main negative line to measure all current flowing in and out of the battery bank. The Lynx Distributor, on the other hand, centralises the positive connections, offering multiple fused outputs for various DC devices. This modular design simplifies wiring, improves safety by consolidating fuses, and allows for easy expansion or maintenance.
Victron SmartShunt and Lynx Distributor Wiring Procedure
Proper wiring is fundamental for the correct operation and safety of your Victron system. This procedure details the steps for "Basic electrical connections" for the SmartShunt and the "Connect DC wires" process for the Lynx Distributor.
SmartShunt Basic Electrical Connections
- Isolate Power: Before starting any wiring, ensure all power sources, including batteries, solar arrays, and AC chargers, are disconnected and isolated. Refer to the "General safety precautions" and "Battery safety warnings" sections of the manuals.
- Mount the SmartShunt: Securely mount the SmartShunt in a dry, protected location, close to the battery bank.
- Connect Battery Negative: Connect a heavy-gauge cable from the negative terminal of your battery bank to the "Battery Minus" terminal on the SmartShunt.
- Connect System Negative: Connect a heavy-gauge cable from the "System Minus" terminal on the SmartShunt to the common negative busbar of your DC system. All DC loads, chargers, and inverters should connect their negative terminals to this common negative busbar, ensuring all current passes through the SmartShunt for accurate measurement.
- Connect Battery Positive (Voltage Sense): Connect a small-gauge wire from the positive terminal of your battery bank to the "Vbatt+" terminal on the SmartShunt. This provides the SmartShunt with battery voltage.
- Auxiliary Connections (Optional): The SmartShunt offers "Auxiliary electrical connections" for additional monitoring. This can be configured for "monitoring the voltage of a second battery", "midpoint battery bank monitoring" (e.g., for "Connecting and monitoring midpoint in a 24V battery bank" or "Connecting and monitoring midpoint in a 48V battery bank"), or "temperature monitoring".
Lynx Distributor Wiring
- Isolate Power: Reiterate that all power sources must be isolated. Always follow "Safety warnings for Lynx Distribution System".
- Mount the Lynx Distributor: Mount the Lynx Distributor securely. If interconnecting multiple Lynx modules, ensure they are properly aligned.
- Connect Positive Input: Connect the main positive cable from your battery bank (or a Lynx Power In module) to one of the large M8 or M10 terminals on the Lynx Distributor.
- Connect DC Loads and Chargers: For each DC load or charger, connect its positive cable to one of the fused output terminals on the Lynx Distributor.
- Place Fuses: "Place Lynx Distributor fuses" into the appropriate slots for each connected device. Ensure the fuse rating matches the requirements of the connected load and cable size.
- Ground and Negative Connections: Ensure all "Ground and Negative connections" for the loads and chargers are routed to the common negative busbar, which is monitored by the SmartShunt.
- RJ10 Cable (Optional): If integrating with other Lynx modules or a GX device, "Connect RJ10 cable(s)" between the modules for communication.
SmartShunt Configuration via VictronConnect App
After completing the physical wiring, the SmartShunt requires configuration using the "VictronConnect app". This app allows you to set critical parameters for accurate battery monitoring.
Setting Name | Description |
|---|---|
Battery capacity | Defines the total amp-hour capacity of your battery bank. |
Charged voltage | The voltage at which the battery is considered fully charged. |
Discharge floor | The minimum state of charge (SoC) percentage you wish to maintain. |
Tail current | The current threshold below which the battery is considered fully charged. |
Charged detection time | The duration for which 'Charged voltage' and 'Tail current' conditions must be met for the battery to be considered fully charged. |
Peukert exponent | A factor accounting for the non-linear relationship between discharge rate and usable capacity. |
Charge efficiency factor | Accounts for energy losses during charging. |
Current threshold | A minimum current value for the SmartShunt to register current flow. |
Time-to-go averaging period | The period over which current data is averaged for time-to-go calculations. |
Battery SOC on reset | Allows manual setting of the State of Charge after a reset. |
Synchronise SoC to 100% | Manually synchronises the State of Charge to 100%. |
Zero current calibration | Calibrates the current reading when no current is flowing. |
Low SoC alarm settings | Configures the alarm threshold for low State of Charge. |
Low voltage alarm | Sets the alarm threshold for low battery voltage. |
High voltage alarm | Sets the alarm threshold for high battery voltage. |
High temperature alarm | Configures the alarm threshold for high battery temperature (if auxiliary sensor is used). |
Low temperature alarm | Configures the alarm threshold for low battery temperature (if auxiliary sensor is used). |
Midpoint deviation alarm | Sets the alarm threshold for voltage imbalance in a split battery bank (if auxiliary sensor is used). |
Monitor Mode | Defines what the SmartShunt's auxiliary input monitors. |
Current measurement direction | Configures the direction of current measurement. |
Reset history | Clears all historical data recorded by the SmartShunt. |
Reset PIN code | Resets the Bluetooth PIN code for the device. |
Custom name | Allows assigning a custom name to the SmartShunt. |
Firmware | Displays and allows updating the device firmware. |
Reset to defaults | Restores all settings to their factory default values. |
To access these settings, connect to your SmartShunt using the VictronConnect app via Bluetooth. The app provides a user-friendly interface for adjusting each parameter.
Installation Safety and Switchgear Requirements
Working with high-current DC systems requires strict adherence to safety protocols.
- Isolation Procedure: Always begin by ensuring all power sources are isolated. This includes disconnecting the positive and negative terminals of the battery bank, switching off any solar charge controllers, and disabling AC input to inverters/chargers. This prevents accidental short circuits or electric shock.
- Personal Protective Equipment (PPE): Wear appropriate PPE, including insulated gloves and eye protection, when working with batteries and high-current DC wiring.
- Insulated Tools: Use insulated tools to prevent accidental shorting of terminals. A spanner across a battery bank can short hundreds of amps, leading to severe burns or fire.
- Cable Sizing and Termination: Ensure all DC cables are correctly sized for the expected current and length, as per local electrical codes. Terminate cables with appropriate lugs, ensuring secure, low-resistance connections. Tighten battery terminals to the manufacturer's specified torque.
- Fusing: The Lynx Distributor requires "Place Lynx Distributor fuses" for each output. These fuses protect downstream equipment and cabling from overcurrent. Ensure fuse ratings are appropriate for the connected loads and cable gauges.
- Earthing: Ensure the entire DC system, including the battery bank and inverter chassis, is properly earthed according to local regulations.
What the Published Sources Do Not Tell You
While the Victron manuals provide comprehensive guidance, certain specifics are not explicitly detailed in the provided documentation. For instance, the exact "Values" or ranges for most SmartShunt settings like 'Battery capacity', 'Charged voltage', or 'Discharge floor' are not specified; these depend entirely on the specific battery chemistry and manufacturer recommendations. Similarly, "No specific error or fault codes with meanings are listed" in the provided SmartShunt documentation, meaning troubleshooting certain issues may require broader knowledge of battery monitor behaviour. The "Lynx Distributor M8" and "Lynx Distributor M10" models are not explicitly rated for current capacity in the provided text, requiring reference to other sections of the full manual or product specifications. Furthermore, detailed step-by-step wiring diagrams beyond section titles are not present, implying reliance on visual aids within the full product manuals or general electrical knowledge.
Add a battery at a surveyed price
Installers quote supply and fitting of the battery on this page for your existing or new system.
How this pays for the site: installers pay SolarNevs a fixed introduction fee when we pass them a genuine enquiry. They cannot pay to appear higher, and our surveyed prices are published before any introduction. You can also take our dated price tables straight to any installer.
Frequently asked questions
How do I wire a Victron SmartShunt and Lynx Distributor?
The SmartShunt connects to the negative battery terminal and the system's common negative busbar, while the Lynx Distributor manages positive DC connections for loads and chargers. Always isolate all power before making connections.
What is the Victron SmartShunt used for?
The SmartShunt is a battery monitor that measures current, voltage, and calculates state of charge. Models include the SmartShunt 500A and SmartShunt 1000A.
How do I configure the SmartShunt?
Configuration is done via the VictronConnect app, which allows setting parameters such as 'Battery capacity', 'Charged voltage', and various alarms.
What safety precautions are needed for Victron Lynx Distributor wiring?
Always follow 'General safety precautions' and 'Battery safety warnings'. Ensure all power is isolated, and use appropriate personal protective equipment before handling high-current DC connections.
Can the SmartShunt monitor a second battery or temperature?
Yes, the auxiliary connection on the SmartShunt can be used for 'monitoring the voltage of a second battery', 'midpoint battery bank monitoring', or 'temperature monitoring'.
References
- Victron Energy (SmartShunt Manual) — accessed 29 August 2026
- Victron Energy (Lynx Distributor Manual) — accessed 29 August 2026
Related guides
More from what to buy — and how not to get cheated.