APsystems DS3 And QT2 Microinverter Setup Guide
Updated 15 September 2026 · By SolarNevs Research Desk, Dealer surveys + verified sources · 6 sources · Method ↗
Key Takeaways
- APsystems DS3 and QT2 are dual-module and quad-module three-phase microinverters, respectively.
- They communicate via a Zigbee 2.4GHz mesh network to an ECU gateway.
- Installation requires certified trunk cables and IP68 watertight connectors.
- High-voltage DC and AC grid interconnection must be performed by certified, licensed personnel.
Understanding APsystems DS3 and QT2 Microinverters
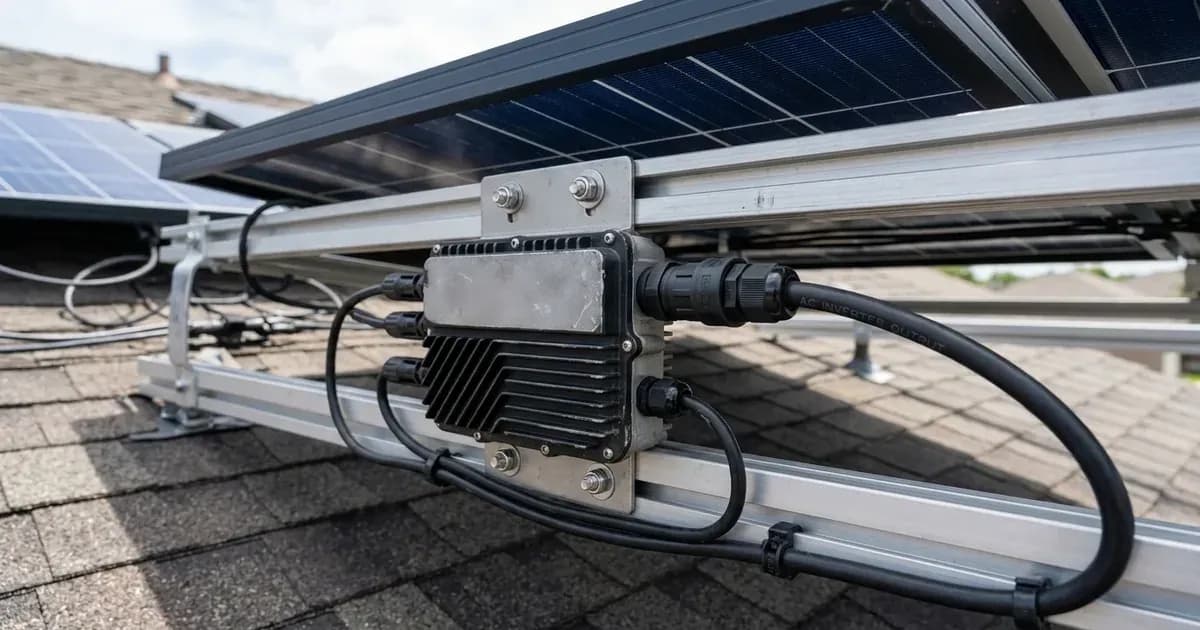
The APsystems DS3 is a dual-module microinverter, designed to handle two solar panels. The APsystems QT2 is a quad-module three-phase microinverter, suitable for connecting four solar panels within a three-phase electrical system. These devices convert the direct current (DC) produced by solar panels into alternating current (AC) for use in your home or export to the grid.
Microinverter Model | Supported PV Modules | AC Grid Topology | DC Input Current Capacity | Communication Interface |
|---|---|---|---|---|
APsystems DS3 | Dual-module (2 panels) | Single-phase | 20A | Zigbee 2.4GHz mesh |
APsystems QT2 | Quad-module (4 panels) | Three-phase | 20A | Zigbee 2.4GHz mesh |
Microinverter installations must comply with manufacturer guidelines to ensure safe and efficient operation. This includes adherence to specific wiring practices and communication protocols.
Communication and Monitoring
APsystems microinverters, including the DS3 and QT2, utilise a Zigbee 2.4GHz mesh communication system. This network allows the microinverters to communicate with an Energy Communication Unit (ECU) gateway. The ECU collects performance data from each microinverter, enabling system monitoring and remote management. This setup provides granular visibility into the performance of individual solar panels.
Wiring and Connection Requirements
Proper wiring is critical for the safety and performance of any microinverter system. For APsystems DS3 and QT2 microinverters, wiring must use certified trunk cables and IP68 watertight connectors. These components are designed to withstand outdoor conditions and ensure a secure, long-lasting electrical connection. The trunk cable provides the AC connection backbone for multiple microinverters, simplifying installation and reducing wiring complexity.
The microinverters also feature an integrated rapid shutdown function, enhancing safety by quickly de-energising the solar array in an emergency. They have a 20A DC input current capacity, which dictates the maximum current that can be supplied by the connected solar panels to each input.
Safety and Professional Installation
Working with solar power systems involves high-voltage DC and AC electricity, which can be dangerous if not handled correctly. High-voltage DC, AC grid interconnection, and switchgear modifications must be performed by certified, licensed personnel. This ensures that the installation meets all local electrical codes and safety standards.
Grid protection settings must match regional distribution codes. These settings are crucial for ensuring the microinverter operates safely in conjunction with the local electricity network and automatically disconnects if grid conditions become unstable. Incorrect settings can pose risks to both the property and the wider electricity network.
What you can check yourself, and what you cannot
As a homeowner, you can visually inspect your solar panels and microinverters for obvious physical damage or debris. You can also monitor your system's performance through the APsystems monitoring portal, accessible via the ECU gateway. This allows you to track energy production and identify any potential issues.
However, any work involving electrical connections, opening the microinverter enclosure, or modifying wiring must be left to certified professionals. This includes tightening terminals, replacing components, or adjusting grid protection settings. Attempting these tasks without proper training and tools can lead to serious injury, damage to equipment, and voiding of warranties. Always isolate PV, battery, and AC breakers before any inspection or maintenance, and wait for the manual's specified capacitor discharge time. Opening the unit is authorised-service work.
What the published sources do not tell you
The specific technical details, such as exact voltage ranges, current limits for specific models within the DS3 or QT2 series, or detailed step-by-step installation instructions, are typically found in manufacturer installation manuals. These documents are often proprietary or require installer access. Furthermore, specific regional distribution codes for grid protection settings vary by Distribution Network Operator (grid operator) in Great Britain and are not universally published in a single, accessible source. The precise requirements for certified trunk cables and IP68 connectors may also vary slightly between different manufacturers or regions, necessitating consultation of the most current local standards and product datasheets.
Still showing the fault? Book a technician
If the steps above did not clear it, tell us the inverter or battery and the exact code. We pass it to a technician who covers your city; visit charges are quoted before they come.
How this pays for the site: the technician or verifier pays SolarNevs a fixed introduction fee. Nobody pays to be recommended, and you are free to use our free guides instead.
Frequently asked questions
What are the primary technical requirements for apsystems ds3 and qt2 microinverter setup guide?
Key requirements include compliance with local grid codes, correct equipment certification, and proper electrical isolation.
Who is authorized to install and inspect apsystems ds3 and qt2 microinverter setup guide?
All high-voltage DC, AC grid tie-in, and switchboard modifications must be performed by a qualified, accredited electrical professional.
How is export power limited in apsystems ds3 and qt2 microinverter setup guide?
Export limiting is achieved using certified bidirectional smart meters or power sensors providing dynamic feedback to the inverter system.
References
- APsystems DS3 dual-module single-phase microinverter product specifications — accessed 6 September 2026
- APsystems QT2 quad-module three-phase microinverter, four input channels and 20A maximum input current — accessed 6 September 2026
- APsystems ECU gateway and EMA portal, module-level monitoring over ZigBee — accessed 6 September 2026
- APsystems document library, DS3 and QT2 datasheets and installation manuals — accessed 6 September 2026
- APsystems accessories, AC bus and trunk cables and connectors for microinverter systems — accessed 6 September 2026
- NEPRA (Alternative and Renewable Energy) Distributed Generation and Net Metering Regulations 2015, SRO 892(I)/2015 — accessed 6 September 2026
Related guides
More from inverter errors & fixes.