Fronus Battery Settings and Pairing Guide for Hybrid Inverters
Updated 6 September 2026 · By SolarNevs Research Desk, Dealer surveys + verified sources · 1 source · Method ↗
Key Takeaways
- Fronus hybrid inverters are rebadged Axpert VM III units, and their settings are based on this platform's manual.
- The manual provides specific charge settings for AGM/Gel and Flooded lead-acid batteries.
- For LiFePO4 batteries, the manual mentions BMS communication ports but does not list specific voltage settings.
- Always consult your battery manufacturer's specifications and match them to the inverter's programmable settings.
- Prioritize safety by disconnecting power and using insulated tools when working with battery connections. Be very cautious when working with metal tools on or around batteries to avoid sparks or short circuits. A spanner across terminals can short a battery bank that delivers hundreds of amps.
How do I set up my Fronus inverter for different battery types?
Setting up your Fronus hybrid inverter correctly for your battery type is crucial for battery health and system performance. Fronus inverters are based on the Voltronic Axpert VM III platform, so their settings menus follow that manual. The inverter allows you to select predefined battery types or customize charging parameters for lead-acid batteries. For LiFePO4 batteries, the inverter relies on communication with the battery's internal Battery Management System (BMS).
Diagnosis: Identifying and configuring your battery settings
Before adjusting any settings, identify your battery type and gather its manufacturer's recommended charge parameters.
- Identify your battery type: Determine if you have an AGM, Gel, Flooded (wet cell), or LiFePO4 battery. Each type has specific charging voltage requirements.
- Access the inverter's settings menu: Use the inverter's display and buttons to navigate to the programmable settings. The manual for the Axpert VM III platform provides program numbers for each setting.
- Select Battery Type (Setting 05: Battery type):
- For AGM or Gel batteries, select "AGM (default)".
- For Flooded batteries, select "Flooded".
- If your battery manufacturer's specifications differ from the inverter's default AGM/Flooded settings, select "User-Defined". This option allows you to manually set bulk, float, and low DC cut-off voltages.
- For LiFePO4 batteries, the manual does not provide specific voltage settings under Setting 05. If your LiFePO4 battery supports closed-loop communication, ensure it is connected via the BMS communication port (CAN, RS232, or RS485). If not, you may need to use "User-Defined" and carefully match your battery's specifications, but this is generally not recommended without direct BMS control.
- Review and adjust charge parameters (if User-Defined or Flooded): If you selected "User-Defined" or "Flooded" for lead-acid batteries, proceed to adjust the specific voltage and equalization settings according to your battery manufacturer's recommendations.
Fronus Inverter Battery Charge Settings (Lead-Acid)
The following table details the battery-specific settings available on Fronus inverters, based on the Axpert VM III manual. These settings are primarily for lead-acid battery types (AGM/Gel, Flooded) or for user-defined configurations.
Setting Name | Program | 1.5KW/3KW Value | 5KW Value | Battery Type | Notes |
|---|---|---|---|---|---|
Battery type | 05 | AGM (default) | AGM (default) | AGM / Gel Battery | Selects predefined charge parameters. |
Battery type | 05 | Flooded | Flooded | Flooded Battery | Selects predefined charge parameters. |
Battery type | 05 | User-Defined | User-Defined | User-Defined | Allows manual setting of Programs 26, 27, 29, 31. |
Bulk charging voltage (C.V voltage) | 26 | 28.2V (default) | 56.4V (default) | AGM / Gel Battery | Constant Voltage (CV) charge phase. |
Bulk charging voltage (C.V voltage) | 26 | 25.0V to 31.5V (0.1V increment) | 48.0V to 61.0V (0.1V increment) | User-Defined | Set according to battery manufacturer. |
Floating charging voltage | 27 | 27.0V (default) | 54.0V (default) | AGM / Gel Battery | Maintains full charge after bulk phase. |
Floating charging voltage | 27 | 25.0V to 31.5V (0.1V increment) | 48.0V to 61.0V (0.1V increment) | User-Defined | Set according to battery manufacturer. |
Low DC cut-off voltage | 29 | 21.0V (default) | 42.0V (default) | AGM / Gel Battery | Protects battery from over-discharge. |
Low DC cut-off voltage | 29 | 21.0V to 24.0V (0.1V increment) | 42.0V to 48.0V (0.1V increment) | User-Defined | Set according to battery manufacturer. |
Battery equalization | 30 | Battery equalization disable (default) | Battery equalization disable (default) | Flooded or User-Defined | Enables or disables the equalization function. |
Battery equalization | 30 | Battery equalization | Battery equalization | Flooded or User-Defined | Enable for periodic overcharge to balance cells. |
Battery equalization voltage | 31 | 29.2V (default) | 58.4V (default) | Flooded or User-Defined | Voltage for the equalization charge. |
Battery equalization voltage | 31 | 25.0V to 31.5V (0.1V increment) | 48.0V to 61.0V (0.1V increment) | Flooded or User-Defined | Set according to battery manufacturer. |
Battery equalized time | 33 | 60min (default) | 60min (default) | Flooded or User-Defined | Duration of each equalization cycle. |
Battery equalized time | 33 | 5min to 900min (5min increment) | 5min to 900min (5min increment) | Flooded or User-Defined | Adjustable duration. |
Battery equalized timeout | 34 | 120min (default) | 120min (default) | Flooded or User-Defined | Maximum time for an equalization cycle. |
Battery equalized timeout | 34 | 5min to 900min (5min increment) | 5min to 900min (5min increment) | Flooded or User-Defined | Adjustable maximum duration. |
Equalization interval | 35 | 30days (default) | 30days (default) | Flooded or User-Defined | Frequency of equalization cycles. |
Equalization interval | 35 | 0 to 90 days (1 day increment) | 0 to 90 days (1 day increment) | Flooded or User-Defined | Adjustable frequency. |
Equalization activated immediately | 36 | Disable (default) | Disable (default) | Flooded or User-Defined | Starts equalization immediately if enabled. |
Equalization activated immediately | 36 | Enable | Enable | Flooded or User-Defined | Manually trigger an equalization cycle. |
General Charging and System Settings
Beyond battery-specific voltages, other settings influence how your Fronus inverter manages battery charging and overall system operation.
- Maximum charging current (Setting 02: Maximum charging current): This setting determines the total charging current from both solar and utility sources. Values range from 10A to 60A, with 70A and 80A available for 3KW/5KW models. It is crucial to set this value to match your battery's maximum recommended charge current (C-rate) to prevent damage. For example, a 100Ah battery might have a recommended max charge current of 20A. You can learn more about battery sizing and compatibility at
/pk/batteries. - Maximum utility charging current (Setting 11: Maximum utility charging current): This specifically limits the current drawn from the utility grid for charging. It can be set from 2A to 40A, with 50A and 60A for 3KW/5KW models. If the value in Setting 02 is smaller, the inverter will apply the Setting 02 value as the overall limit.
- Charger source priority (Setting 16: Charger source priority): This setting dictates which source (solar, utility, or both) the inverter prioritizes for charging.
- Solar first: Solar power charges the battery, and utility power only charges when solar is unavailable.
- Solar and Utility (default): Both solar and utility power charge the battery simultaneously.
- Only Solar: Solar is the sole charging source.
LiFePO4 Battery Considerations
The Axpert VM III manual, which forms the basis for Fronus inverters, does not provide specific voltage settings for LiFePO4 batteries. Instead, it mentions "BMS Communication port: CAN and RS232 or RS485". This indicates that for optimal and safe operation with LiFePO4 batteries, the inverter is designed to communicate directly with the battery's internal Battery Management System (BMS).
When using LiFePO4 batteries:
- Prioritize BMS communication: If your LiFePO4 battery supports CAN, RS232, or RS485 communication, connect it to the inverter's BMS port. This allows the battery's BMS to dictate the precise charging and discharging parameters to the inverter, ensuring the battery operates within its safe limits.
- Avoid manual voltage settings: Attempting to manually set bulk, float, and low DC cut-off voltages for LiFePO4 batteries using the "User-Defined" option (Settings 26, 27, 29) without direct BMS control carries significant risk. LiFePO4 batteries have tighter voltage tolerances than lead-acid, and incorrect settings can lead to overcharging, undercharging, or damage.
- Consult battery manufacturer: Always refer to your LiFePO4 battery manufacturer's documentation for specific communication protocols and recommended inverter settings.
Safety: Working with batteries and inverters
Working with solar inverters and batteries involves high voltages and currents that can be dangerous. Always prioritize safety.
- Read the manual: Always read all instructions and cautionary markings on the unit, batteries, and manual before use.
- Qualified personnel: Only qualified personnel should install this device with a battery.
- Disconnect power: Disconnect all wirings before attempting any maintenance or cleaning to reduce the risk of electric shock. Strictly follow the installation procedure when disconnecting AC or DC terminals.
- Insulated tools: Be very cautious when working with metal tools on or around batteries to avoid sparks or short circuits. Use insulated tools.
- Correct polarity: Ensure correct polarity (+ to + and - to -) for DC connections before making the final connection or closing any DC breaker/disconnector.
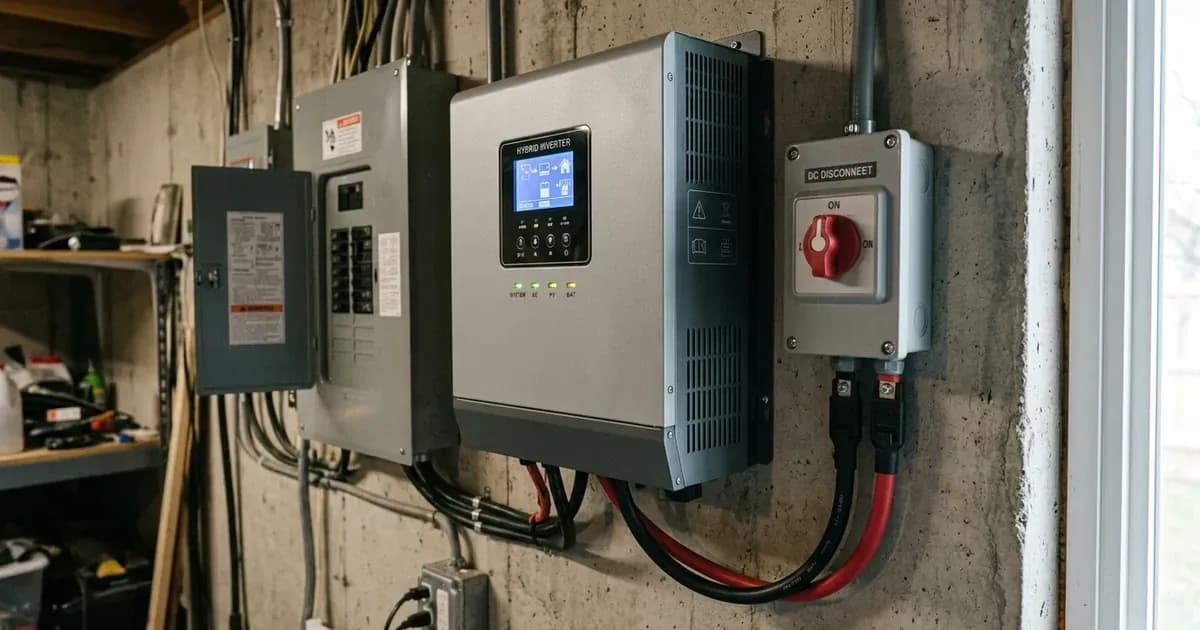
- Over-current protection: A 150A fuse is provided as over-current protection for the battery supply. It is also requested to install a separate DC over-current protector or disconnect device between the battery and the inverter. Disconnect all wiring before attempting any maintenance or cleaning, and have this protection fitted by a qualified installer.
- Ventilation for flooded batteries: Equalization, boost charge, or desulfation drives flooded lead-acid cells into the hydrogen gassing region. Ensure the area is well-ventilated and free of sparks or flames if performing these operations.
- Never charge a frozen battery: Charging a frozen battery can cause it to explode.
When to call a technician instead
While many settings can be adjusted by the user, some situations require professional intervention to ensure safety and prevent damage.
- Uncertainty about settings: If you are unsure about the correct voltage or current settings for your specific battery, especially for LiFePO4 batteries without clear manual guidance, consult a qualified solar technician. Incorrect settings can permanently damage your batteries or inverter.
- BMS communication issues: If your LiFePO4 battery is not communicating correctly with the inverter via CAN, RS232, or RS485, and you have verified physical connections, a technician can diagnose communication faults.
- Persistent fault codes: If the inverter displays fault codes related to battery voltage (e.g., "03 Battery voltage is too high" or "04 Battery voltage is too low") despite correct settings, there may be an underlying hardware issue with the inverter or battery that requires professional diagnosis.
- Internal fuse tripped: If the inverter shows no response after power on due to an internal fuse trip, contact a repair center for replacement. Do not attempt to replace internal fuses yourself.
- Warranty concerns: Attempting unauthorized repairs or modifications may void your inverter's warranty. If the issue is complex or you are uncomfortable performing the steps, contact a Fronus service center.
Still showing the fault? Book a technician
If the steps above did not clear it, tell us the inverter or battery and the exact code. We pass it to a technician who covers your city; visit charges are quoted before they come.
How this pays for the site: the technician or verifier pays SolarNevs a fixed introduction fee. Nobody pays to be recommended, and you are free to use our free guides instead.
Frequently asked questions
What battery types can I use with a Fronus inverter?
Fronus inverters, based on the Axpert VM III platform, provide specific settings for AGM/Gel and Flooded lead-acid batteries. For LiFePO4 batteries, the manual indicates BMS communication ports (CAN, RS232, RS485) but does not detail specific voltage settings, implying reliance on the battery's internal BMS.
How do I set the charging voltage for my lead-acid battery on a Fronus inverter?
For lead-acid batteries, you can adjust the Bulk charging voltage (Setting 26: Bulk charging voltage) and Floating charging voltage (Setting 27: Floating charging voltage). Default settings are 28.2V for 1.5KW/3KW models and 56.4V for 5KW models (AGM/Gel). Always match these to your battery manufacturer's specifications.
What is the low DC cut-off voltage setting for Fronus inverters?
The Low DC cut-off voltage (Setting 29: Low DC cut-off voltage) protects your battery from over-discharge. Default settings are 21.0V for 1.5KW/3KW models and 42.0V for 5KW models (AGM/Gel). You can set this value between 21.0V to 24.0V for 1.5KW/3KW models and 42.0V to 48.0V for 5KW models in user-defined mode.
Can I equalize my flooded lead-acid batteries using a Fronus inverter?
Yes, Fronus inverters support battery equalization (Setting 30: Battery equalization) for Flooded or User-Defined battery types. You can enable equalization and set parameters like equalization voltage (Setting 31: Battery equalization voltage), equalized time (Setting 33: Battery equalized time), and equalization interval (Setting 35: Equalization interval). Equalization, boost charge, or desulfation drives flooded lead-acid cells into the hydrogen gassing region. Ensure the area is well-ventilated and free of sparks or flames if performing these operations.
What should I do if my LiFePO4 battery is not charging correctly with my Fronus inverter?
Fronus inverter manuals do not provide specific voltage settings for LiFePO4 batteries. Ensure your LiFePO4 battery has a compatible BMS and that the inverter's BMS communication port (CAN, RS232, or RS485) is correctly connected and configured, allowing the battery's BMS to manage charging parameters.
References
- Axpert VM III Manual — accessed 23 August 2026
Related guides
More from inverter errors & fixes.