Configuring Victron GX Devices for Exide Lithium Batteries
Updated 18 September 2026 · By SolarNevs Research Desk, Dealer surveys + verified sources · 1 source · Method ↗
Key Takeaways
- Ensure your Victron GX device runs Venus OS v2.90 or above for Exide compatibility.
- The Exide Sonnenschein Module Pro LIBM0480050-G01 battery requires specific firmware (v1.10+) for integration.
- Correct CAN-bus wiring and termination are critical for communication between the battery and the GX device.
- Specific VEConfigure and GX device settings must be applied for proper system operation.
How do I set up Victron equipment to work with Exide lithium batteries?
Setting up Victron Energy systems with Exide Sonnenschein Module Pro lithium batteries involves specific firmware requirements and configuration steps for both the Victron GX device and the inverter/charger. This guide outlines the necessary procedures to ensure proper communication and operation between your Victron and Exide components.
Configuration Steps for Victron and Exide Systems
This section details the steps required to configure your Victron GX device and inverter/charger for compatibility with the Exide Sonnenschein Module Pro LIBM0480050-G01 lithium battery.
1. Firmware Verification
Before starting any configuration, ensure your Victron GX device is running the required firmware version.
- GX Device Firmware: The GX device needs to run at least Venus OS v2.90. It is recommended to always use the latest firmware version for the GX device.
- Exide Battery Firmware: The Sonnenschein Module Pro LIBM0480050-G01 battery should be running firmware v1.10 or newer.
2. CAN-bus Connection
The CAN-bus connection facilitates communication between the Exide battery and the Victron GX device.
- Cable: A CAN-bus cable ships with the Exide battery.
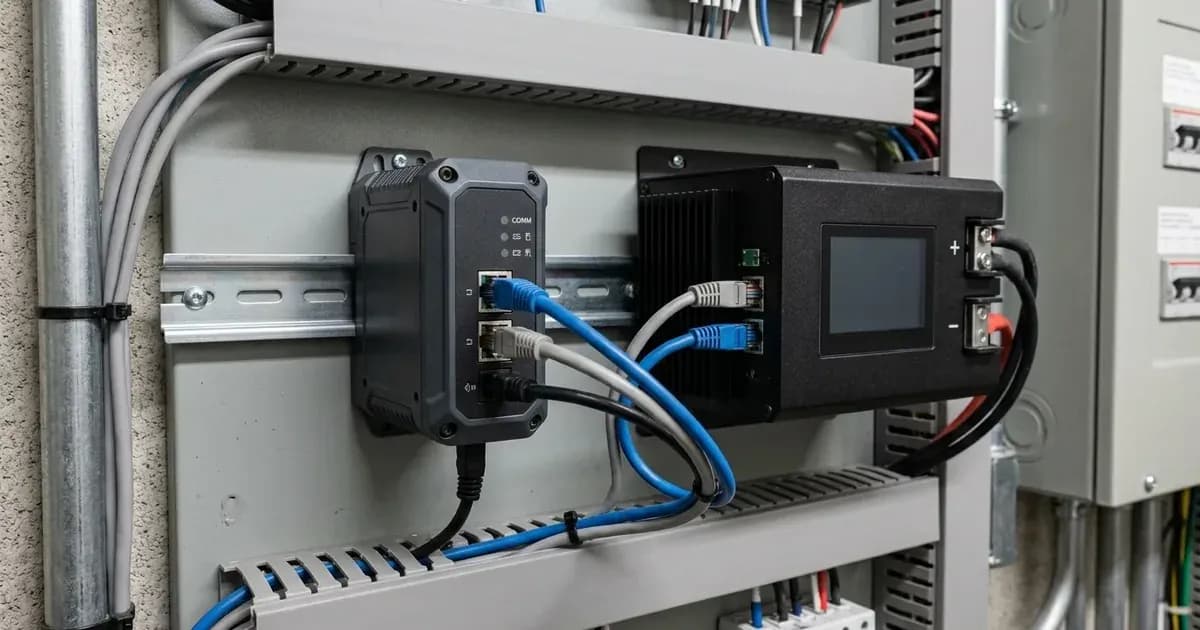
- Wiring: Connect the side of the cable with pins 7 and 8 to the GX device. Connect the side with pins 1 (CAN-L) and 2 (CAN-H) to the battery.
- Termination: Exide batteries come with a CAN-bus terminator already installed or supplied. If assembling the battery from individual modules, remember to terminate the CAN-bus on the last module using the supplied terminator.
3. Victron VEConfigure Settings
These settings are applied to your Victron MultiPlus or Quattro inverter/charger using the VEConfigure software.
- General Tab:
- Check the "Enable battery monitor" function.
- Set the battery capacity to the total capacity of the battery: the Ah capacity per module multiplied by the number of battery modules.
- The "State of charge when bulk finished" and "Charge efficiency" parameters can be left at their default settings as they have no effect in this type of installation.
- Charger Tab:
- Set "Battery type" to Lithium.
- Set "Charge curve" to Fixed.
- Set "Absorption voltage" to 51.0 V.
- Set "Float voltage" to 50.8 V.
- Set "Absorption time" to 1 Hr.
- Inverter Tab:
- Set "DC input low shut-down" to 42V.
- Set "DC input low restart" to 45V.
- Set "DC input low pre-alarm" to 45V.
- ESS Assistant:
- Select the "externally managed Lithium battery" option.
- Set "Sustain voltage" to 45V.
- Set all "Dynamic cut-off values" to 43.5V.
- The "Restart offset" can be left at its default of 1.2V.
4. GX Device Configuration
These settings are applied directly on your Victron GX device interface.
- CAN-profile: Navigate to Settings → Services → CAN-profile and select the "CAN-bus BMS (500 kbits/s)" profile.
- DVCC: Navigate to Settings → DVCC and set DVCC to ON.
- Shared Voltage Sense: In Settings → DVCC, set "Shared Voltage Sense" to OFF.
- Shared Temperature Sense: In Settings → DVCC, set "Shared Temperature Sense" to OFF.
5. MPPT Settings (Precautionary)
While the GX device typically governs MPPT charge characteristics via DVCC, it is a good practice to set initial values in VictronConnect for any connected MPPT solar charge controllers.
- Set "Battery voltage" to 48V.
- Set "Absorption voltage" to 51V.
After completing these steps, the Exide ESS should be visible as a battery in the device list on your GX device. The parameters option within the battery page will show the actual battery charge and discharge limits. In normal operation, the MPPT charge characteristics are governed by the GX device via DVCC, with instructions from the connected Exide battery.
Common Configuration Checks
If your Victron system is not communicating with or charging the Exide battery correctly, review these common setup points.
Symptom detail | Likely cause | Fix |
|---|---|---|
Exide battery not visible on GX device | Incorrect CAN-bus wiring or profile | Verify CAN-bus cable connections (pins 7&8 to GX, 1&2 to battery). Ensure "CAN-bus BMS (500 kbits/s)" is selected in GX device settings. |
Battery visible but not controlling charge/discharge | DVCC not enabled or shared senses active | Set DVCC to ON in GX device settings. Set "Shared Voltage Sense" and "Shared Temperature Sense" to OFF. |
Charging/discharging limits not reflecting battery status | Incorrect VEConfigure settings for battery management | Ensure "Enable battery monitor" is checked and "externally managed Lithium battery" is selected in ESS Assistant. |
System not charging or shutting down prematurely | Incorrect voltage setpoints in VEConfigure | Verify "Absorption voltage" (51.0 V), "Float voltage" (50.8 V), "DC input low shut-down" (42V), and "Sustain voltage" (45V) are correctly set. |
Battery not recognized as lithium type | Incorrect battery type setting | In VEConfigure's Charger tab, set "Battery type" to Lithium and "Charge curve" to Fixed. |
Battery not communicating (if multiple modules) | Missing CAN-bus terminator | Ensure the CAN-bus terminator is installed on the last battery module in the chain. |
Victron and Exide Battery Pairing Settings
The following tables summarize the critical settings for integrating the Exide Sonnenschein Module Pro LIBM0480050-G01 battery with Victron Energy systems.
VEConfigure Settings for MultiPlus/Quattro
These parameters are configured using the VEConfigure software for your inverter/charger.
Parameter | Setting | Product/Context |
|---|---|---|
Enable battery monitor | Checked | General tab |
Battery capacity | Total capacity of battery (Ah per module * number of modules) | General tab |
State of charge when bulk finished | Default | General tab |
Charge efficiency | Default | General tab |
Battery type | Lithium | Charger tab |
Charge curve | Fixed | Charger tab |
Absorption voltage | 51.0 V | Charger tab |
Float voltage | 50.8 V | Charger tab |
Absorption time | 1 Hr | Charger tab |
DC input low shut-down | 42V | Inverter tab |
DC input low restart | 45V | Inverter tab |
DC input low pre-alarm | 45V | Inverter tab |
Externally managed Lithium battery option | Selected | ESS Assistant |
Sustain voltage | 45V | ESS Assistant |
Dynamic cut-off values | 43.5V (all values) | ESS Assistant |
Restart offset | 1.2V (Default) | ESS Assistant |
GX Device Configuration
These settings are accessed through the menu on your Victron GX device.
Parameter | Value | Menu Path |
|---|---|---|
CAN-bus BMS (500 kbits/s) | Selected | Settings → Services → CAN-profile |
DVCC | ON | Settings → DVCC |
Shared Voltage Sense | OFF | Settings → DVCC |
Shared Temperature Sense | OFF | Settings → DVCC |
MPPT Settings (Precautionary)
These settings can be applied via VictronConnect for connected MPPT solar charge controllers.
Parameter | Setting | Context |
|---|---|---|
Battery voltage | 48V | VictronConnect |
Absorption voltage | 51V | VictronConnect |
Safety: Lithium Battery Handling
Exide Sonnenschein Module Pro batteries are lithium-ion (LiFePO4) chemistry. These batteries contain a Battery Management System (BMS) for safe operation.
- Do not open the battery enclosure. Opening the battery can expose you to electrical hazards and damage the internal components, potentially voiding the warranty and creating unsafe conditions.
- Thermal Management: Ensure adequate ventilation around the battery to prevent overheating. While LiFePO4 is stable, extreme temperatures can affect performance and safety.
- Electrical Connections: Always disconnect all power sources (solar, grid, battery) before making or breaking electrical connections. Use insulated tools to prevent accidental shorts, which can cause severe burns or equipment damage. A short across a 48V battery bank can release hundreds of amps instantly.
When to call a technician instead
If you have followed all configuration steps and verified all settings, but your Victron system still does not properly communicate with or manage the Exide battery, it is advisable to contact a qualified solar technician. Issues beyond basic configuration, such as internal battery faults, CAN-bus hardware problems, or complex system interactions, often require specialized diagnostic tools and expertise. Attempting advanced repairs without proper training can lead to further damage or unsafe conditions.
Frequently asked questions
What Victron firmware is required for Exide battery compatibility?
The Victron GX device needs to run at least Venus OS v2.90. It is recommended to always use the latest firmware version for the GX device to ensure full compatibility and features.
Which Exide lithium battery model is compatible with Victron systems?
The Exide Sonnenschein Module Pro LIBM0480050-G01 lithium battery, with firmware v1.10 or newer, has been tested and certified for use with Victron Energy systems.
What Victron equipment is compatible with the Exide Sonnenschein Module Pro battery?
All 48V Victron MultiPlus and Quattro inverter/chargers are compatible. For monitoring and control, a Victron GX device such as a Color Control GX, Venus GX, or Cerbo GX is required.
How do I connect the Exide battery to the Victron GX device?
A CAN-bus cable ships with the Exide battery. Connect the side with pins 7 and 8 to the GX device, and the side with pins 1 (CAN-L) and 2 (CAN-H) to the battery.
What are the key Victron VEConfigure settings for Exide lithium batteries?
Important settings include enabling the battery monitor, setting battery type to Lithium, charge curve to Fixed, absorption voltage to 51.0 V, and float voltage to 50.8 V. Also, select the 'externally managed Lithium battery' option in the ESS Assistant.
References
- Victron Energy Battery Compatibility: Exide — accessed 23 August 2026
Related guides
More from schemes, subsidies & financing.