Solar Water Pump Not Running: Diagnosis and Fixes
Updated 7 September 2026 · By SolarNevs Research Desk, Dealer surveys + verified sources · 4 sources · Method ↗
Key Takeaways
- Insufficient solar input is the most common reason a solar water pump fails to run.
- Always begin by checking the PV array's voltage and current at the pump controller's input terminals.
- Before touching any electrical components, ensure all power sources (PV, AC backup) are disconnected.
- Stop DIY troubleshooting and call a qualified technician if you suspect internal controller damage or pump motor failure.
Why is my solar water pump not running or providing low water flow?
The most frequent cause for a solar water pump not running or delivering insufficient water is a lack of adequate solar power reaching the pump controller. This can be due to low sunlight, shading, or issues with the solar panels themselves. Your first step should be to verify the power input from your PV array.
Diagnosis Steps for a Non-Operating Solar Water Pump
Follow these steps to systematically diagnose why your solar water pump is not functioning.
Step 1: Check Solar Irradiance and PV Array Condition
- Observe Sunlight: Ensure there is sufficient, direct sunlight on your solar panels. Heavy clouds, dust, or shading from trees or buildings can significantly reduce power output.
- Inspect Panels: Visually check your solar panels for dirt, debris, or damage. Clean panels if necessary. Refer to a guide on /pk/guides/systems/solar-panel-cleaning-maintenance for best practices.
- Check Wiring: Inspect all visible wiring from the solar panels to the pump controller for loose connections, corrosion, or physical damage.
Step 2: Verify PV Array Voltage and Current at the Controller
Safety Warning: High DC voltages from solar panels can be dangerous. Always disconnect the PV array from the controller before making or breaking connections. Use appropriate personal protective equipment (PPE) and insulated tools. A spanner across a live PV array can short hundreds of amps.
- Measure Open Circuit Voltage (Voc): Disconnect the PV array from the pump controller. Using a multimeter, measure the DC voltage across the positive and negative terminals of the PV array. Compare this reading to the maximum open circuit voltage (Voc) specified for your controller. For example, a The Sun Pays DF-48 controller has a maximum open circuit voltage of <100V. An SAJ PDS33-2SXX controller has a maximum open circuit voltage of DC450V. An INVT Goodrive100-PV -S2 controller specifies a maximum open circuit voltage of 440V.
- Measure Voltage Under Load (Vmp): Reconnect the PV array to the controller. If the pump is attempting to start or run, measure the voltage at the controller's PV input terminals. This voltage should fall within the controller's MPPT voltage range. For instance, a The Sun Pays DF-48 requires an MPPT voltage range of 60 to 90V. An SAJ PDS33-2SXX operates within an MPPT range of DC275-380V. An INVT Goodrive100-PV -S2 has an MPPT voltage range of 200–400V. An ebosun solar pump controller typically has an MPPT range of 60-380V.
- Measure Input Current: If your multimeter can measure DC current, measure the current flowing from the PV array into the controller. Compare this to the controller's maximum input current. For example, many The Sun Pays DF-series controllers (DF-12 to DF-110) have a maximum input current of 15A. An ebosun solar pump controller for 0.5-1HP pumps has a maximum input current of 10A, while for 1.5-3HP pumps, it is 12A.
- Interpret Readings:
- Voltage too low: Indicates insufficient sunlight, too few panels in series, or a fault within the PV array. See /pk/guides/fixes/pv-array-troubleshooting for more detailed steps.
- Voltage within range, but no current: Suggests a controller fault or a disconnected pump.
- Voltage too high: Your PV array may be oversized for the controller, potentially damaging it. Use /pk/tools/solar-pump-sizing to check compatibility.
Step 3: Check the Pump Controller Status
- Display/Indicators: Many modern pump controllers, like those from SAJ Electric or INVT, feature a display or LED indicators. Check for any error codes or status messages. Consult your specific controller's manual for the meaning of these indicators. The manufacturer's manuals do not list specific error codes for this model, so this information must come from your specific controller's manual.
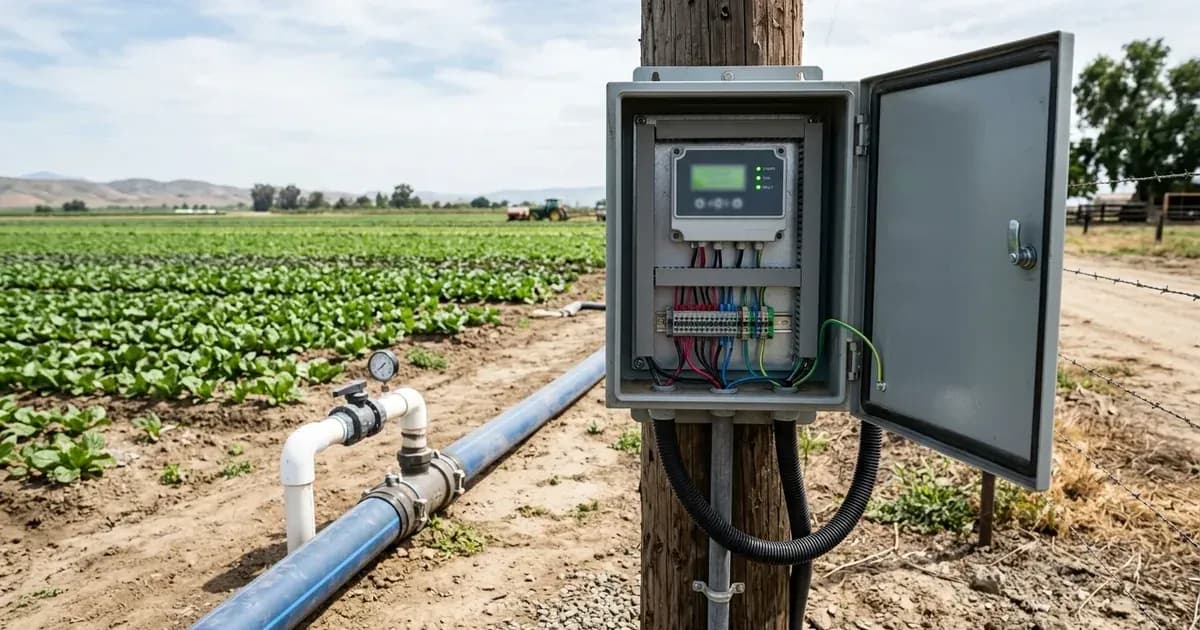
- Power Output: If the PV input is correct, use your multimeter to check for output voltage from the controller to the pump. For AC pumps driven by VFDs (like SAJ PDS33/PDS23 or INVT Goodrive100-PV), this will be AC voltage. For DC pumps (like some ebosun or Dankoff systems), it will be DC voltage. No output indicates a controller fault.
- Backup AC Input (if applicable): If your controller (e.g., SAJ PDS33/PDS23 series) supports backup AC power, ensure the AC supply is present and correctly connected. Test if the pump runs on AC power, which can help isolate the fault to the PV side or the pump itself.
Step 4: Inspect the Pump and Water Source
- Water Level: Check the water level in your well, borehole, or tank. Many pumps have dry-run protection features that prevent them from operating without water, such as those from ebosun.
- Pump Inlet/Outlet: Ensure the pump's inlet is not blocked by debris and the outlet pipe is clear.
- Pump Motor: Listen for any unusual noises from the pump motor. A humming sound without water flow might indicate a seized impeller or a blockage.
- Pressure Switch/Float Switch: If your system uses a pressure switch or float switch, ensure it is functioning correctly and not preventing the pump from starting.
Common Causes and Fixes for Solar Water Pump Issues
Symptom detail | Likely cause | Fix |
|---|---|---|
Pump not running at all | Insufficient solar irradiance | Check for shading, clean panels, ensure adequate sunlight. |
| Controller fault | Check error codes on display, verify PV input and pump output. |
| Wiring fault (PV or pump) | Inspect all connections for looseness, corrosion, or damage. |
| Dry-run protection activated | Check water source level. |
Pump runs but no water flow | Dry-run protection activated | Check water source level. |
| Blocked inlet or outlet | Clear any debris from pump inlet or piping. |
| Air lock in pump or pipes | Prime the pump if necessary, check for leaks. |
| Impeller seized or damaged | Inspect pump for physical damage, call technician if internal. |
Low water flow | Insufficient solar irradiance | Check for shading, clean panels. |
| Undersized pump or PV array | Consult system specifications, consider system upgrade. |
| High head or friction losses | Check pipe diameter, length, and fittings; reduce head if possible. |
| Partially blocked inlet/outlet | Clear any debris. |
Intermittent operation | Fluctuating solar irradiance | Observe weather patterns, check for intermittent shading. |
| Loose electrical connections | Inspect and tighten all wiring connections. |
| Overheating controller/pump | Ensure proper ventilation, check ambient temperature. The Sun Pays DF-series controllers operate between 15 to 60°C. SAJ PDS33/PDS23 series controllers operate between -20 to 60°C. INVT Goodrive100-PV series VFDs operate between -10 to 50°C. |
Error code displayed | Specific controller fault | Consult your controller's manual for error code definitions and troubleshooting steps. |
Understanding Your Solar Pump System
A solar water pump system typically consists of solar panels (PV array), a pump controller (often a Variable Frequency Drive or VFD for AC pumps, or a DC controller for DC pumps), and the pump itself. The controller manages the power from the PV array, optimizing it for the pump motor. Some advanced controllers, like SAJ Electric's PDS33 and PDS23 series, can also accept backup AC power.
Safety Considerations
Working with solar power systems involves significant electrical hazards. Always prioritize safety:
- Disconnect All Power: Before inspecting or working on any part of the system, ensure the PV array is disconnected, and any backup AC power is turned off at the breaker. Wait for the controller's internal capacitors to discharge (refer to your manual for specific times).
- High DC Voltage: Solar panels produce high DC voltages, which can be lethal. Never touch bare wires.
- High AC Voltage: VFDs convert DC to high AC voltage for the pump motor. Treat all AC components with extreme caution.
- Insulated Tools: Use only properly insulated tools for electrical work.
- Personal Protective Equipment (PPE): Wear safety glasses, insulated gloves, and appropriate footwear.
- Water and Electricity: Keep all electrical components dry. Water is a conductor and increases the risk of electric shock.
- Moving Parts: Be aware of moving parts if you are inspecting the pump directly.
When to Call a Technician Instead
While many basic troubleshooting steps can be performed by a homeowner, some issues require professional expertise. You should call a qualified solar technician if:
- Internal Controller Faults: Your controller displays error codes that indicate an internal hardware failure, or if you suspect internal damage. Attempting to open the controller housing may void your warranty.
- Pump Motor Failure: If the pump motor is humming but not turning, or if there are signs of physical damage to the pump itself, it likely requires specialized repair or replacement.
- Persistent Electrical Issues: If you have verified correct PV input and controller output, but the pump still does not run, there might be complex electrical faults beyond basic troubleshooting.
- Warranty Concerns: For systems still under warranty, attempting DIY repairs beyond simple checks may void the warranty. Always check your warranty terms before proceeding with any repairs.
- Lack of Expertise: If you are uncomfortable or unsure about any diagnostic step, especially those involving electrical measurements, it is safer to consult a professional.
Still showing the fault? Book a technician
If the steps above did not clear it, tell us the inverter or battery and the exact code. We pass it to a technician who covers your city; visit charges are quoted before they come.
How this pays for the site: the technician or verifier pays SolarNevs a fixed introduction fee. Nobody pays to be recommended, and you are free to use our free guides instead.
Frequently asked questions
Why is my solar water pump not pumping water?
The most common reasons include insufficient solar irradiance, low water levels in the source, or a power supply issue to the pump controller. Check your PV array's voltage and current first.
What voltage should my solar panels provide to the pump controller?
The required voltage depends on your controller model. For example, a The Sun Pays DF-48 controller requires an MPPT voltage range of 60 to 90V, with a maximum open circuit voltage below 100V. Always refer to your specific controller's manual for exact specifications.
How do I check if my solar pump controller is working?
Visually inspect the controller for any display messages or indicator lights. If available, measure the DC voltage input from the PV array and the output voltage to the pump. Compare these readings to the specifications in your controller's manual.
What does 'dry-run protection' mean for a solar pump?
Dry-run protection is a feature that automatically shuts down the pump if the water level drops too low, preventing damage to the pump motor. If your pump has this feature, check the water source level.
When should I call a technician for my solar water pump?
You should call a technician if you suspect internal electrical faults within the controller, if the pump motor is damaged, or if troubleshooting steps do not resolve the issue. Do not attempt repairs that involve opening the controller or pump housing unless you are qualified.
References
- The Sun Pays Solar Pump Manual — accessed 23 August 2026
- SAJ PDS33 Solar Pump Controller User Manual — accessed 23 August 2026
- INVT GD100-PV Series Solar Pumping VFD Manual — accessed 23 August 2026
- ebosun manual solar pumps — accessed 23 August 2026
Related guides
More from inverter errors & fixes.