Sunsynk High-Voltage Battery Guide: Expansion, Recharging, and Troubleshooting
Updated 16 September 2026 · By SolarNevs Research Desk, Dealer surveys + verified sources · 7 sources · Method ↗
Key Takeaways
- Expanding an existing Sunsynk high-voltage (HV) battery rack requires a minimum of four new modules to ensure proper communication and balancing.
- Recharging deeply discharged HV battery modules requires a DC charger set to a low amperage (1A) and constant monitoring to prevent cell damage.
- Sudden jumps or drops in State of Charge (SOC) often indicate unbalanced modules within the HV rack, requiring individual charging and recalibration.
- The Battery Management Unit (BMU) password for Sunsynk HV batteries is "123".
Expanding Your Sunsynk High-Voltage Battery Rack
HV Operation / Procedure | Minimum Hardware & Voltage Parameter | Required Steps & Configuration Key |
|---|---|---|
Rack Module Expansion | Minimum 4 new battery modules added together | Charge existing to 100% → add new modules → update BMU count (password |
Deep Discharge Recovery | DC bench charger set to 52V and 1A output | Continuous monitoring required (never leave unattended overnight); full grid charge to 100% post-reconnection |
Battery-Only Cold Start | BMU | Turn on BMU → confirm LCD count → turn off BMU → wait 2 minutes → turn BMU on → press inverter ON/OFF |
SOC Imbalance Correction | Minimum 4 modules charged together in stack | Isolate low-SOC modules → charge to match rack voltage → reconnect full rack → 100% grid charge calibration |
Dual Rack Interfacing (50kW) | Dedicated BAT1 / BAT2 terminal pairs | Pair BAT1 strictly with BMS 1 and BAT2 strictly with BMS 2 (do not cross-connect inputs) |
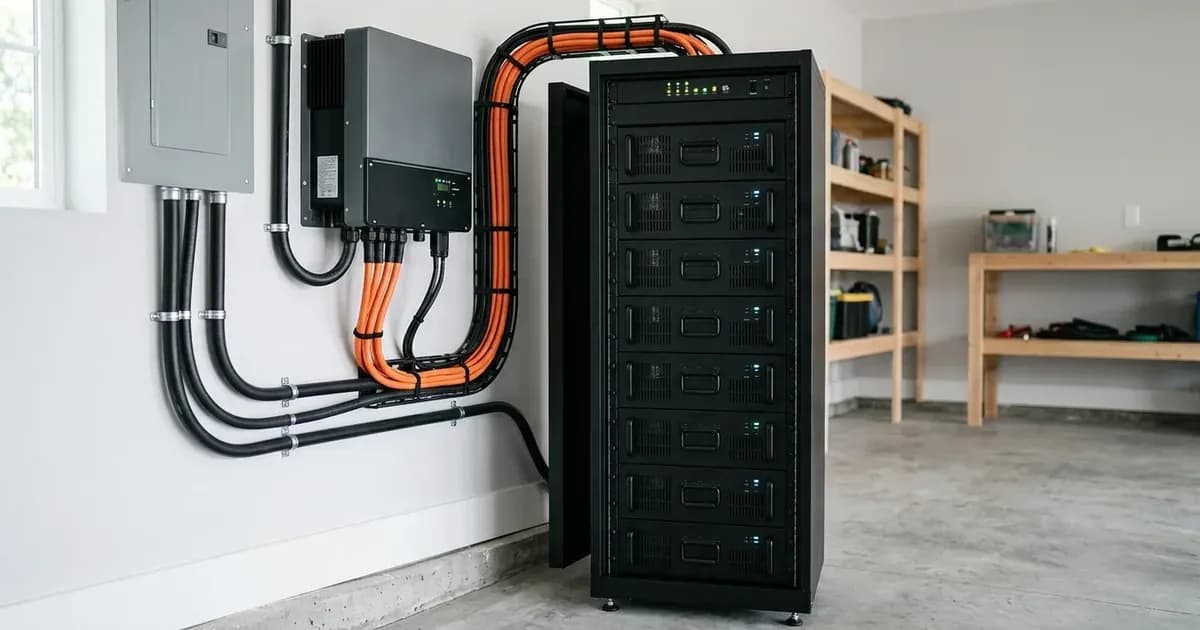
Expanding an existing high-voltage (HV) battery system requires careful adherence to specific procedures to maintain system stability and battery health. Unlike low-voltage systems, HV racks have particular requirements for module additions.
What is actually going on
High-voltage battery systems rely on a Battery Management Unit (BMU) to manage and balance the individual battery modules within the rack. When expanding, the BMU needs a sufficient number of modules to establish and maintain correct communication and balancing protocols. Adding too few modules can disrupt this balance and lead to performance issues or errors.
The Expansion Procedure for HV Batteries
When adding extra HV batteries to a pre-existing HV battery rack, the minimum number of batteries for expansion is four. The expansion procedure involves several steps to ensure the new and existing modules integrate correctly:
- Charge Existing Modules: Charge the pre-existing battery modules in your HV battery stack to 100% SOC, using either PV or AC charging.
- Power Off System: Power off the entire system, including the inverter and battery rack.
- Add New Modules: Remove the pre-existing batteries from the rack and add your four or more new batteries to the rack. Connect these new batteries to the BMU.
- Adjust BMU Number: Adjust the BMU number accordingly. This setting is accessed on the BMU display by pressing the icon of a person and entering password "123". Ensure this number reflects the quantity of new batteries to facilitate correct communications.
- Charge New Modules: Charge these newly added batteries to 100% SOC, from either PV or AC.
- Reintegrate Original Modules: Power off the system again and add the original batteries back into the stack.
- Final BMU Update: Power the system back on and ensure you update the BMU number again for the correct total number of batteries in the rack.
Recharging a Flat Sunsynk High-Voltage Battery Stack
A deeply discharged high-voltage battery module or stack requires a specific and cautious recharging approach to prevent damage.
What is actually going on
Lithium-ion batteries, including those in HV racks, can be permanently damaged if discharged too deeply or recharged incorrectly after a deep discharge. Using a low-amperage DC charger helps to slowly bring the battery voltage back to an operational range without causing stress or over-voltage to individual cells.
The Recharging Procedure for HV Batteries
If you need to recharge HV batteries using a DC charger, follow these steps carefully:
- Set DC Charger Output: Set the DC charger to OUTPUT, to 52V and at 1A. This low amperage is crucial to ensure that no cell damage can be caused during the initial recovery phase.
- Monitor Charging: Using a DC charger to recharge batteries can be dangerous if done at too high an amperage and if not monitored when the battery is reaching voltage. Over-voltage can lead to damage of lithium cells and fires.
- Do Not Leave Unattended: These batteries must NOT be left unattended overnight whilst charging. Continuous monitoring is essential.
- Post-BMU Reconfiguration: When you receive the BMU back (e.g., after a repair or specific reconfiguration), the batteries MUST charge to 100% via the grid to ensure proper calibration.
Powering a Sunsynk Inverter from High-Voltage Batteries Only
In situations where grid power is unavailable or disconnected, you may need to power your Sunsynk inverter solely from your high-voltage battery system.
What is actually going on
Sunsynk inverters require both power and communication from the battery system to operate. The Battery Management Unit (BMU) of the HV battery rack communicates critical information like State of Charge (SOC), voltage, and current to the inverter, allowing it to manage charging and discharging safely.
Connecting and Powering Up
To power your HV inverter from batteries only, ensure the following cabling and sequence:
- Power Cabling: Ensure that the positive and negative power cable from the BMU is connected to the Battery terminals of the inverter.
- BMS Communication: The BMS Communication cable must be connected from the PCOM located at the back of the BMU to the BMS 1 inside the Inverter. For detailed BMS communication wiring, refer to the
/za/guides/fixes/sunsynk-bms-communication-faultguide. - Power-On Sequence:
- Switch the circuit breaker on and press the start button on the BMU.
- Once the BMU is turned on, check the BMU number on the LCD. This number should match the number of batteries you have connected.
- Once this step is completed, turn the battery BMU off using the start button and the circuit breaker.
- Wait 2 minutes.
- Start the BMU back up in the same order as step 1.
- Press the ON/OFF button on the side of the inverter.
Troubleshooting Sudden SOC Changes in High-Voltage Batteries
If your Sunsynk high-voltage battery's State of Charge (SOC) suddenly increases or decreases, it indicates an imbalance within the battery rack.
What is actually going on
A sudden change in SOC typically means that one or more of the battery modules in the HV rack are at a significantly lower SOC than the rest. The BMU attempts to manage the overall rack, but if individual modules are out of sync, it can lead to inaccurate readings and potential performance issues. This can also occur if the batteries do not reach 100% SOC at least once every 7-10 days, preventing the BMS from recalibrating.
Resolving SOC Imbalances
To address sudden SOC changes and rebalance your HV battery modules:
- Identify Low Modules: The problem occurs when one or more of the Battery Modules in the HV Rack are much lower SOC than the rest.
- Individual Charging: These low battery modules will need to be connected to the BMU on their own and charged up to the same SOC / Voltage of the other battery modules.
- Minimum Modules for Charging: Note that the minimum number of batteries that can be charged together in a stack are four.
- Full System Recalibration: After individual modules are balanced, reconnect them all and charge them all to 100% together. This allows for a full calibration of the BMS.
If the BMU screen shows a different voltage to the inverter battery voltage, or the voltage fluctuates rapidly, it could be due to batteries connected to the wrong inputs on a 50kW inverter, or mixing of battery inputs. Ensure that each battery stack is connected only to its respective battery terminals. BMS communications should also be connected to the correct BMS inputs in the inverter (BMS 1 corresponding with BAT1 and BMS2 corresponding with BAT2).
What you can change yourself, and what you cannot
As a system owner, you can perform certain troubleshooting steps and adjustments, particularly those related to the BMU display and following prescribed power-on or expansion sequences. For instance, you can check the BMU password ("123") and follow the steps for resolving SOC imbalances by individually charging modules.
However, any work involving physical wiring, deep discharge recovery below specific voltage thresholds (e.g., if a low-voltage battery is below 40V, contact support), or modifications to grid-protection settings must be performed by a registered person. In South Africa, such work requires a Certificate of Compliance (CoC) to ensure safety and adherence to NRS 097-2-1 standards. Attempting these tasks yourself can void warranties, create safety hazards, and potentially breach your connection agreement with Eskom or your municipality.
What the published sources do not tell you
While Sunsynk provides detailed guidance for high-voltage battery systems, certain specifics are not always available in text format. For example, specific pinout diagrams for BMS communication cables, particularly for newer HV models, are often referenced visually in manuals rather than described in text. Similarly, detailed internal schematics or advanced troubleshooting steps for complex BMU faults are typically reserved for authorised service technicians.
Sunsynk's published material covers operational procedures and common fault resolutions, assuming a standard installation. Information regarding specific HV battery models (e.g., capacity, max charge/discharge current) is not explicitly detailed in the provided HV-specific articles, unlike the comprehensive table for low-voltage batteries. This means that while the procedures are clear, the exact specifications of individual HV modules may require consulting the specific product's datasheet or contacting Sunsynk support directly.
Frequently asked questions
What is the minimum number of modules required to expand a Sunsynk high-voltage battery rack?
When adding extra high-voltage batteries to a pre-existing rack, the minimum number of batteries for expansion is four. This ensures correct communication and balancing within the battery management unit (BMU).
How do I recharge a deeply discharged Sunsynk high-voltage battery module?
Use a DC charger set to 52V and 1A output. This low amperage helps prevent cell damage. It is critical not to leave these batteries unattended overnight while charging, as over-voltage can lead to damage or fire.
Why does my Sunsynk high-voltage battery SOC suddenly change?
This often indicates that one or more battery modules in the rack have a much lower State of Charge (SOC) than the others. These low modules need to be connected to the BMU on their own and charged up to match the SOC or voltage of the other modules.
What is the password for the Sunsynk high-voltage battery BMU?
The password for accessing settings on the Sunsynk high-voltage series battery BMU display is '123'.
Can I power my Sunsynk inverter using only high-voltage batteries?
Yes, ensure the positive and negative power cables from the BMU are connected to the inverter's battery terminals, and the BMS communication cable connects from the BMU's PCOM to BMS 1 on the inverter. Follow the specific power-on sequence outlined in the manual.
References
- Sunsynk Support - HV Batteries Adding a New Battery Module to an Existing Rack — accessed 27 August 2026
- Sunsynk Support - High-Voltage Battery SOC Suddenly Increases or Decreases — accessed 27 August 2026
- Sunsynk Support - High-Voltage Battery Recharging — accessed 27 August 2026
- Sunsynk Support - High-Voltage Powering On an Inverter from Battery Only — accessed 27 August 2026
- Sunsynk Support - HV Battery BMU Password — accessed 27 August 2026
- Sunsynk Support - High-Voltage Battery Connection Methods — accessed 27 August 2026
- Sunsynk Support - High-Voltage BMU Screen Shows a Different Voltage to the Inverter Battery Voltage — accessed 27 August 2026
Related guides
More from inverter errors & fixes.