Victron MPPT Control Display and Monitoring Setup Guide
Updated 15 September 2026 · By SolarNevs Research Desk, Dealer surveys + verified sources · 2 sources · Method ↗
Key Takeaways
- The Victron MPPT Control display provides real-time and historical data for Victron BlueSolar and SmartSolar MPPT chargers.
- It connects via a VE.Direct cable and requires no separate power supply, drawing power directly from the charger.
- Always de-energize the solar array and disconnect the battery supply before installing or routing VE.Direct data cables.
- Use factory-molded VE.Direct cables and avoid cutting or splicing them to ensure reliable communication.
How do I set up and monitor my Victron MPPT solar charger with the MPPT Control display?
The Victron MPPT Control display connects to your BlueSolar or SmartSolar MPPT charger via a VE.Direct cable to provide real-time monitoring and historical data. Installation involves physically mounting the display and connecting the VE.Direct cable, after which it powers on automatically, allowing you to view live status and configure settings.
Installation and Initial Setup
Setting up the Victron MPPT Control display involves a few straightforward steps, from physical mounting to initial power-up and navigation. This guide focuses on ensuring proper connection and basic operation.
1. Unpacking and Mounting
The Victron MPPT Control display is designed for flexible installation. You can flush-mount it into a standard 65mm circular panel cutout or use an optional surface wall mount enclosure. Victron offers specific wall mount enclosures, such as the "Wall mount enclosure for BMV or MPPT Control" or the "Wall mount enclosure for BMV and Color Control GX / MPPT Control" for dual instrument setups. Choose the mounting option that best suits your installation environment.
2. Connecting the VE.Direct Cable
A VE.Direct cable is necessary to connect the display to your solar charger. This cable is not included with the MPPT Control display and must be purchased separately. VE.Direct cables are available in lengths ranging from 0.3 meters up to 10 meters.
- Step 2.1: Safety First. Before connecting any cables, de-energize the solar PV array and disconnect the battery supply to prevent electrical hazards.
- Step 2.2: Connect to MPPT. Plug one end of the VE.Direct cable into the VE.Direct communication port on your BlueSolar or SmartSolar MPPT charge controller.
- Step 2.3: Connect to Display. Plug the other end of the VE.Direct cable into the back of the MPPT Control display.
- Step 2.4: Secure Cables. Route and secure the VE.Direct cables away from high-current AC and DC power conductors to avoid electromagnetic interference. Avoid cutting or splicing VE.Direct communication cables; use factory-molded lengths.
3. Initial Power-Up and Navigation
Once the VE.Direct cable is securely connected to both the MPPT charger and the display, the MPPT Control display will power on automatically. It receives all necessary power directly over the 4-pin VE.Direct port, requiring no auxiliary power supply.
- Step 3.1: Power On. Reconnect the battery supply and then the solar PV array. The display should illuminate.
- Step 3.2: Basic Navigation. Use the SELECT and SETUP push buttons on the display to scroll through menus and access different data screens. The display features a backlit LCD screen for visibility.
4. Accessing Real-Time Data
The MPPT Control display provides live telemetry, allowing you to see the status of your solar charging system in real-time.
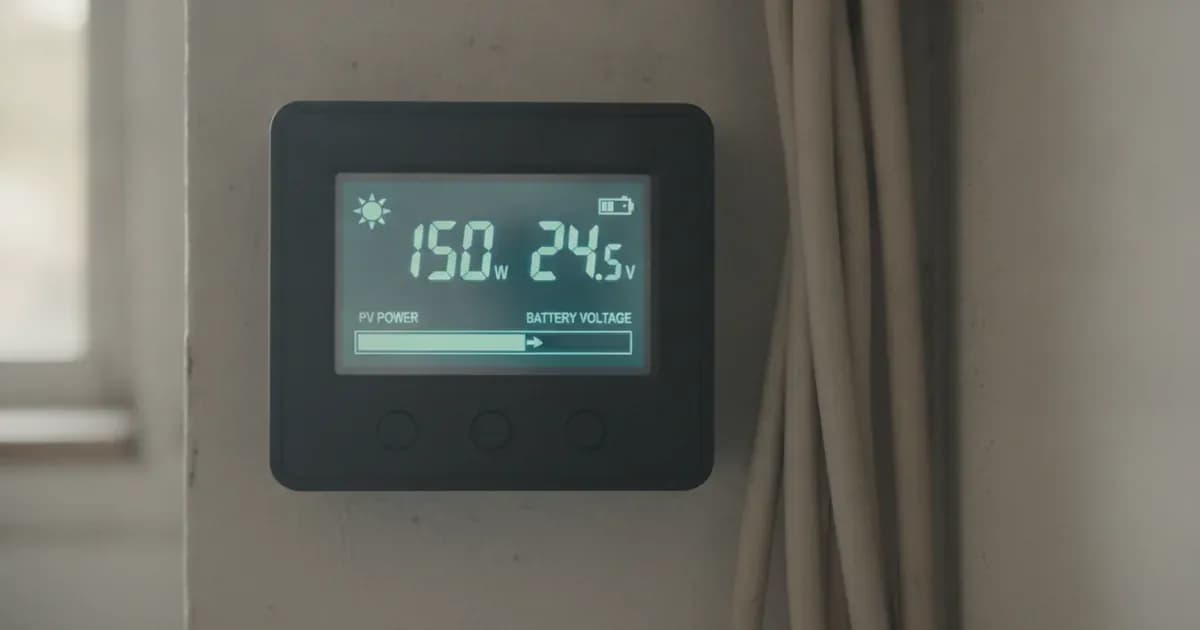
- Step 4.1: View Status. On the main screen, you can typically see key parameters such as Solar PV Power in Watts, Battery Voltage, Charge Current in Amperes, and the active Charge State (Bulk, Absorption, Float). The MPPT Control lets you see the status as well as setup all BlueSolar MPPT Charge Controllers that have a VE.Direct port.
5. Reviewing Historical Data
Beyond real-time monitoring, the display logs historical data, offering insights into your system's performance over time.
- Step 5.1: Access History Menu. From the main status screen, press the SELECT button.
- Step 5.2: Navigate Daily Logs. You can navigate back through individual daily yield logs for up to 30 days. A brief popup shows the day number as you scroll.
- Step 5.3: Cumulative Data. The display also tracks cumulative historic values over the lifetime of the solar charger, including total kilowatt-hours (kWh) generated and lifetime error logs.
- Step 5.4: Exit History. To return to the main history menu, press the SETUP button. Press the SETUP button again to go back to the status menu.
Troubleshooting Common Issues
While the Victron MPPT Control display is generally reliable, certain issues can arise. This table outlines common symptoms, their likely causes, and recommended fixes.
Symptom detail | Likely cause | Fix |
|---|---|---|
Display blank or communication timeout | Non-standard or severed VE.Direct cable; loose connection | Use only factory-molded VE.Direct cables. Check both ends of the cable for secure connection to the MPPT controller and display. |
Display erratic or signal degradation | High electromagnetic interference (EMI) near non-isolated DC-DC converters | Relocate the display away from strong EMI sources. Secure VE.Direct cables away from high-current AC and DC power conductors. |
Charger Overheat (ERR 17) | MPPT controller heatsink temperature exceeded safe limits | Ensure the MPPT controller has adequate ventilation. Clear any obstructions around its cooling fins. |
Charger Overcurrent (ERR 18) | Short-circuit or overcurrent condition detected on solar panel DC input terminals | Inspect solar panel wiring for shorts or damage. Verify the solar array is correctly sized for the MPPT controller's input current limits. |
PV Overvoltage (ERR 33) | Solar panel open-circuit voltage (Voc) exceeded maximum rating of MPPT controller | Verify the solar panel array design. Ensure the Voc of the solar panels remains within the MPPT controller's specified maximum input voltage under all temperature conditions. |
Monitoring Capabilities and Data Interpretation
The Victron MPPT Control display offers comprehensive monitoring features, enabling users to track their solar system's performance and health.
Real-Time Monitoring
The display provides immediate feedback on your system's operational status. You can view:
- Solar PV Power (W): The instantaneous power being generated by your solar panels.
- Battery Voltage (V): The current voltage of your battery bank.
- Charge Current (A): The current flowing from the MPPT charger to your batteries.
- Charge State: Indicates the current stage of the battery charging process (Bulk, Absorption, Float). Understanding these stages helps confirm proper battery charging.
Historical Data Logging
The MPPT Control display stores valuable historical data, allowing you to analyze performance trends. It logs:
- 30-Day Daily Yield (kWh): Records the kilowatt-hours generated each day for the past 30 days. This helps assess daily energy production and identify performance variations.
- Peak Parameter History: Captures maximum PV voltage and maximum power achieved within each daily period.
- Time in Charge Stages: Logs the duration spent in Bulk, Absorption, and Float stages, which is useful for evaluating battery health and charging efficiency.
Cumulative Lifetime Data
For a long-term overview, the display tracks cumulative historic values over the entire life of the solar charger. This includes:
- Lifetime Total Kilowatt-Hours (kWh) Generated: A running total of all energy produced by your solar system.
- Lifetime Error Logs: A record of all errors encountered, which can be crucial for diagnosing intermittent issues.
For more advanced system integration and monitoring, consider exploring other Victron components like the Victron SmartShunt and Lynx Distributor wiring or the Victron Cerbo GX CAN-bus energy storage synchronization guide. For off-grid or mobile applications, the Victron Orion-Tr Smart DC-DC charger and dual battery setup guide might be relevant.
Safety: Essential Precautions for Installation
Working with solar electrical systems requires adherence to strict safety protocols to prevent injury and equipment damage.
- De-energize Before Work: Always de-energize the solar PV array and disconnect the battery supply before installing, connecting, or routing VE.Direct data cables. This prevents electric shock and short circuits.
- Cable Management: Secure VE.Direct cables away from high-current AC and DC power conductors. This minimizes the risk of electromagnetic interference affecting communication and reduces physical damage to the cables.
- Cable Integrity: Avoid cutting or splicing VE.Direct communication cables. Use only factory-molded lengths up to 10 meters to ensure signal integrity and prevent communication issues.
When to call a technician instead
While many setup and monitoring tasks can be performed by the user, certain situations warrant professional assistance.
- If error codes, such as ERR 17 (Charger Overheat), ERR 18 (Charger Overcurrent), or ERR 33 (PV Overvoltage), persist despite following the troubleshooting steps, a deeper diagnostic may be required.
- If you suspect physical damage to the MPPT controller, the MPPT Control display, or any associated wiring, a qualified technician should inspect the system.
- If the installation requires modifying existing electrical systems beyond simple plug-and-play cable connections, or if you are uncomfortable working with high-voltage DC systems, consult a professional.
- Any attempts to open the MPPT controller or display unit for repair should only be done by authorized service personnel, as this may void the manufacturer's warranty. Victron Energy offers a 5-year standard warranty and global repair service for their products.
Add a battery at a surveyed price
Installers quote supply and fitting of the battery on this page for your existing or new system.
How this pays for the site: installers pay SolarNevs a fixed introduction fee when we pass them a genuine enquiry. They cannot pay to appear higher, and our surveyed prices are published before any introduction. You can also take our dated price tables straight to any installer.
Frequently asked questions
What is the Victron MPPT Control display?
The Victron MPPT Control display is a dedicated digital display for Victron BlueSolar and SmartSolar MPPT charge controllers with a VE.Direct communication port. It provides live telemetry and allows parameter configuration.
How does the MPPT Control display connect to my solar charger?
It connects directly to the MPPT charge controller using a VE.Direct communication cable. These cables are available in lengths from 0.3 meters up to 10 meters and are not included with the display.
What data can I monitor with the MPPT Control display?
You can monitor real-time data such as solar PV power in Watts, battery voltage, charging current in Amperes, and the active charge stage (Bulk, Absorption, Float). It also logs 30 days of daily yield and cumulative lifetime generation totals.
Does the MPPT Control display require external power?
No, the display is entirely bus-powered. It receives all necessary power directly through the 4-pin VE.Direct communication cable from the connected MPPT charge controller.
How do I access historical data on the MPPT Control display?
From the main screen, press the SELECT button to navigate to the history menu. You can then scroll back through individual daily yield logs for up to 30 days of historical data.
References
- MPPT Control display manual-en.pdf — accessed 23 August 2026
- Victron Energy MPPT Control product page — accessed 23 August 2026
Related guides
More from what to buy — and how not to get cheated.