Maxpower Inverter Wi-Fi Monitoring Setup Guide
Updated 6 September 2026 · By SolarNevs Research Desk, Dealer surveys + verified sources · 8 sources · Method ↗
Key Takeaways
- Identify your Maxpower inverter series (Suntronic or Voltas) to choose the correct monitoring app.
- The default Wi-Fi password for Suntronic dataloggers is
12345678. - Suntronic (WatchPower) Wi-Fi modules only support 2.4 GHz networks per the OEM manual; for Voltas dataloggers confirm the band requirement in the Solarman/Sofar documentation.
- Always use the correct, verified pinout for BMS communication cables to prevent equipment damage.
How do I set up Wi-Fi monitoring for my Maxpower inverter?
Setting up Wi-Fi monitoring for your Maxpower inverter involves selecting the correct mobile application based on your inverter series and then configuring the Wi-Fi module to connect to your home network. Maxpower Suntronic inverters use the WatchPower app, while Voltas series inverters typically use Solarman Smart/Business or Sofar Cloud. Ensure your home Wi-Fi network operates on the 2.4 GHz band, as Suntronic (WatchPower) Wi-Fi modules do not support 5 GHz, and this is generally true for most inverter Wi-Fi modules; confirm for Voltas series.
Before You Start: Essential Checks
Before beginning the Wi-Fi setup process, perform these checks to ensure a smooth configuration.
- Identify your Inverter Series: Maxpower inverters come in two main series:
- Suntronic Series: These are built on the Voltronic Power OEM platform and use the WatchPower app. Some retailer-bundled plug-and-play Wi-Fi dongles use the SmartESS or SolarPower app instead of WatchPower — if WatchPower cannot find your logger, check the app name printed on the dongle or its leaflet.
- Voltas Series: These are built on the Sofar Solar OEM platform and use Solarman Smart/Business or Sofar Cloud apps. Confirm your inverter model to download the correct application.
- Locate the Wi-Fi Module Part Number (PN): For Suntronic models, the Wi-Fi module's PN is used as its default Wi-Fi network name (SSID). This PN is typically printed on a barcode label found on the bottom of the inverter or directly on the Wi-Fi datalogger itself.
- Verify Home Wi-Fi Frequency: Suntronic (WatchPower) Wi-Fi modules only support 2.4 GHz networks per the OEM manual; for Voltas dataloggers confirm the band requirement in the Solarman/Sofar documentation. Check your home router settings to confirm it broadcasts a 2.4 GHz signal. If your router is dual-band, ensure the 2.4 GHz band is enabled and distinct from the 5 GHz band.
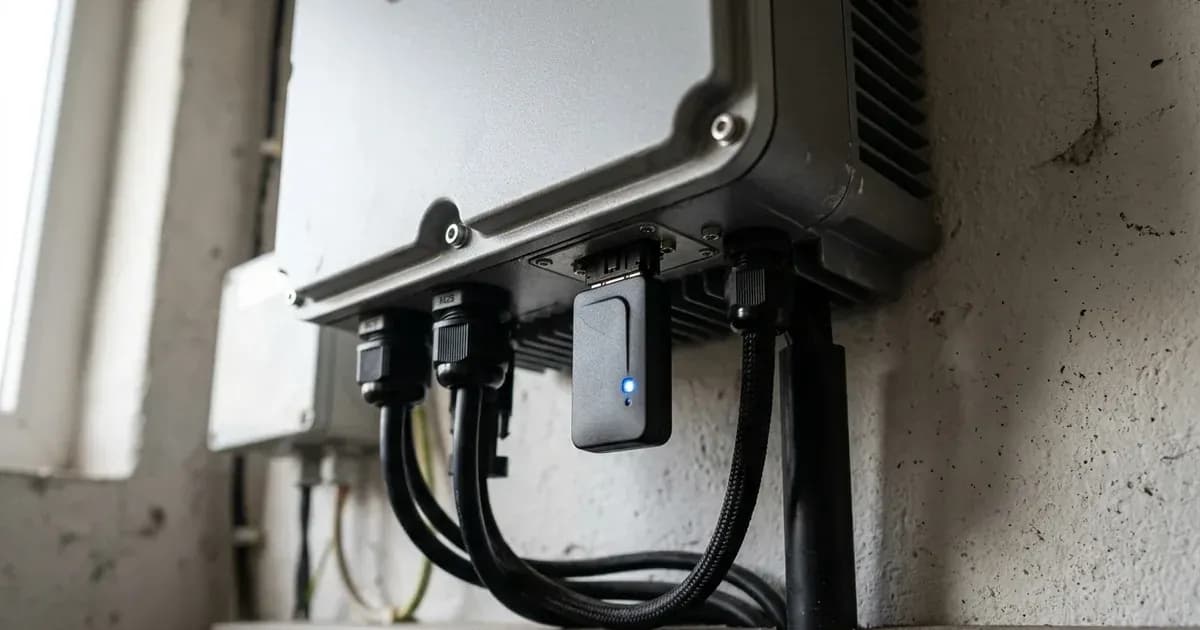
- Ensure Physical Connection: Confirm that the Wi-Fi datalogger is securely plugged into the inverter's communication port. The inverter should be powered on.
Troubleshooting Common Wi-Fi Setup Issues
Symptom detail | Likely cause | Fix |
|---|---|---|
Wi-Fi module's network (SSID) not visible on phone | Module not powered or not properly connected to inverter. | Ensure inverter is on and Wi-Fi dongle is firmly seated in its port. |
Cannot connect to the Wi-Fi module's local AP | Incorrect default password entered. | For factory Suntronic (WatchPower) modules, the default password is |
Wi-Fi module fails to connect to home network | Home Wi-Fi is 5 GHz, not 2.4 GHz. | Configure your home router to broadcast a 2.4 GHz network. Maxpower Suntronic Wi-Fi modules do not support 5 GHz. For Voltas, confirm band requirements in their documentation. |
App shows "device offline" after configuration | Incorrect app used for inverter series or no internet access for the module. | Use WatchPower for Suntronic, Solarman/Sofar Cloud for Voltas. Check home internet connection. |
BMS communication error with lithium battery | Incorrect RJ45 cable pinout or wrong protocol selected. | Verify custom RJ45 cable pinout (PIN 3/5 RS485 or PIN 6/7 CAN) and protocol selection in inverter Program 05. |
Wi-Fi Monitoring Setup Procedure & BMS Communication
The setup process varies slightly depending on your Maxpower inverter series.
For Maxpower Suntronic Inverters (WatchPower App)
Follow these steps to configure Wi-Fi monitoring for your Suntronic inverter using the WatchPower app:
- Install App and Register Account:
- Download
"WatchPower"from the Apple App Store or"WatchPower Wi-Fi"from the Google Play Store. - Open the app, tap "Register", and fill in your user email and account details.
- Scan the Wi-Fi module's Part Number (PN) barcode, which is located on the bottom of the inverter or the datalogger itself. Then, tap "Register".
- Download
- Connect Smartphone to Datalogger AP:
- Go to your smartphone's Wi-Fi settings.
- Select the Wi-Fi network named after your module's PN (e.g.,
WIFI_PN...). - Enter the default password
"12345678". - Return to the WatchPower App and tap the connection confirmation button.
- Select Home Router Network:
- In the App's "Wi-Fi Config" page, select your local home Wi-Fi network's SSID. This must be a 2.4 GHz network.
- Enter the password for your home Wi-Fi router.
- Confirm and Sync to Cloud:
- Tap "Confirm" to finalize the configuration between the Wi-Fi module and the internet.
- The Wi-Fi icon on your inverter's LCD will transition from flashing to a steady light once cloud communication is active.
For Maxpower Voltas Inverters (Solarman Smart/Business or Sofar Cloud)
Maxpower Voltas series inverters, built on the Sofar Solar platform, utilize Solarman Smart/Business or Sofar Cloud for monitoring. The setup procedure for these apps will typically involve connecting the datalogger to your home network via its own web interface or a similar app-guided process. Consult the specific manual for your Voltas model or the Sofar Solar documentation for detailed instructions.
BMS Communication Port & RJ45 Pin Assignment (Suntronic)
When connecting a lithium battery's Battery Management System (BMS) to a Suntronic inverter, a specific RJ45 pinout is required. This ensures proper communication (RS485 or CAN) between the battery and the inverter.
PIN # | Definition / Signal Name | Hardware Function |
|---|---|---|
PIN 1 | RS232TX | RS232 Transmit data (display / debugging) |
PIN 2 | RS232RX | RS232 Receive data |
PIN 3 | RS485B | RS-485 Differential Data Line B (BMS Comm) |
PIN 4 | NC | No Connection |
PIN 5 | RS485A | RS-485 Differential Data Line A (BMS Comm) |
PIN 6 | CANH | Controller Area Network High (CAN-H) |
PIN 7 | CANL | Controller Area Network Low (CAN-L) |
PIN 8 | GND | Signal Ground |
The default BMS RS485 baud rate is 9600 bps. It is crucial to use a custom-made cable that matches this pin assignment. Do not use standard Ethernet patch cables unless you have verified that their pinout aligns with the inverter's requirements for PIN 3/5 (RS485) or PIN 6/7 (CAN). Incorrect wiring, particularly if RS232 voltage (from pins 1/2) is misconnected, can damage your battery's BMS board. For more details on BMS communication, you can refer to guides like our article on Dyness BMS Alarm and Cable Pinout Guide.
For a broader comparison of monitoring apps, see our guide on Inverter Monitoring Apps Compared.
Safety: Electrical Hazards and Environmental Considerations
Working with solar inverters involves significant electrical hazards. Always prioritize safety.
- High-Voltage DC Shock Hazard: Maxpower Suntronic models have solar array open circuit voltages up to 500VDC, while Voltas series can reach up to 1000VDC. These high DC voltages present a lethal shock hazard and can cause persistent DC arcing. Always isolate PV, battery, and AC grid connections before performing any work.
- Internal Capacitor Stored Energy Discharge: Internal DC bus capacitors store high energy even after power is disconnected. You must wait at least 5 minutes after isolating all power sources (PV, battery, AC grid) before removing enclosure covers or touching internal terminals.
- Environmental Placement & IP Boundaries:
- Suntronic Line: These inverters have an IP20 or IP21 rating, meaning they are strictly for indoor installation in a dry, ventilated, dust-controlled environment. Installing them outdoors or exposing them to rain will void the warranty and risks short circuits.
- Voltas Line: These inverters typically have an IP65 or IP66 rating, making them suitable for outdoor wall-mounting and protected against rain and dust ingress.
- BMS Cable Wiring: As noted above, incorrect wiring of BMS communication cables can damage sensitive battery electronics. Ensure the pinout is correct before connecting. For general wiring best practices, review resources like Solar Battery Installation Mistakes.
When to call a technician instead
While Wi-Fi setup is generally a user-friendly process, there are situations where professional assistance is recommended:
- Persistent Connection Issues: If you have followed all troubleshooting steps, confirmed your home network is 2.4 GHz, and are still unable to establish a stable connection, there may be an internal fault with the Wi-Fi module or the inverter's communication port.
- Physical Damage: If the Wi-Fi module or the inverter's communication port appears physically damaged, do not attempt to force connections or repair it yourself.
- BMS Communication Failures: If you are experiencing issues with lithium battery BMS communication and are unsure about custom cable wiring or inverter program settings, contact a certified technician. Incorrect BMS setup can lead to battery damage or unsafe operation.
- Warranty Concerns: Attempting unauthorized repairs or modifications can void your manufacturer warranty — 3 years standard on Suntronic and most Voltas retail lines, while some Voltas models carry 5-year (12K/14K-H4) or 10-year (KTLX-G4 on-grid) warranties per their official product pages. If you suspect a hardware fault, contact Maxpower's helpline at 0331 1114414 or 042-111-441-441.
Still showing the fault? Book a technician
If the steps above did not clear it, tell us the inverter or battery and the exact code. We pass it to a technician who covers your city; visit charges are quoted before they come.
How this pays for the site: the technician or verifier pays SolarNevs a fixed introduction fee. Nobody pays to be recommended, and you are free to use our free guides instead.
Frequently asked questions
Which app do I use for Maxpower inverter Wi-Fi monitoring?
For Maxpower Suntronic inverters, use the WatchPower app. Some retailer-bundled plug-and-play Wi-Fi dongles use the SmartESS or SolarPower app instead of WatchPower — if WatchPower cannot find your logger, check the app name printed on the dongle or its leaflet. For Maxpower Voltas inverters, use Solarman Smart/Business or Sofar Cloud. Ensure you select the correct app for your inverter series.
What is the default Wi-Fi password for Maxpower inverter dataloggers?
The default Wi-Fi password for factory Maxpower Suntronic Wi-Fi modules (WatchPower) is '12345678'. Note that some third-party dataloggers may use different default passwords, such as '123456789' or have an open access point. This password connects your smartphone to the datalogger's local access point during initial setup.
Why won't my Maxpower inverter Wi-Fi connect to my home network?
Maxpower inverter Wi-Fi modules, particularly for Suntronic models, only support 2.4 GHz Wi-Fi networks. Ensure your home router is configured to broadcast a 2.4 GHz signal and that you are attempting to connect to it.
How do I find my Maxpower Wi-Fi module's Part Number (PN)?
The Wi-Fi module's Part Number (PN) is typically printed on a barcode label on the bottom of the inverter or directly on the Wi-Fi datalogger itself. This PN is used as the default SSID for the module's local access point.
Can I use a standard Ethernet cable for BMS communication on my Maxpower inverter?
No, standard Ethernet patch cables should not be used for BMS communication unless you have verified the pinout. Incorrect wiring, especially with RS232 voltage on pins 1 and 2, can damage the battery BMS board. Always follow the manufacturer's specified pin assignment. Before handling any cables or opening the inverter, ensure all power sources (PV, battery, AC grid) are isolated and wait at least 5 minutes for internal capacitors to discharge to avoid lethal shock. Improper connections can also void your warranty. Refer to the 'Safety: Electrical Hazards and Environmental Considerations' section for full safety protocols.
References
- Axpert VM IV-4K6K-TWIN-Off-grid-manual-20220629.pdf — accessed 23 August 2026
- Maxpower Voltas HYD-8K-H6 PRO Product Page — accessed 23 August 2026
- Maxpower Voltas 6KTLM-G4 Product Page — accessed 23 August 2026
- Maxpower Suntronic PV 5500 Ultra Product Page — accessed 23 August 2026
- Maxpower Voltas 12K-H4 Product Page — accessed 23 August 2026
- Maxpower Voltas 14K-H4 Product Page — accessed 23 August 2026
- Maxpower Voltas 10KTLX-G4 Product Page — accessed 23 August 2026
- Maxpower Voltas 20KTLX-G4 Product Page — accessed 23 August 2026
Related guides
More from inverter errors & fixes.