Inverex Inverter Monitoring Setup: Bluetooth and USB Data Logging
Updated 6 September 2026 · By SolarNevs Research Desk, Dealer surveys + verified sources · 1 source · Method ↗
Key Takeaways
- Inverex inverters (Axpert VM III platform) use built-in Bluetooth for mobile monitoring, not Wi-Fi.
- The "WatchPower" app from Google Play is required for Bluetooth monitoring.
- The USB port is for firmware updates and data logging, not direct monitoring.
- Always ensure proper cable connections for reliable communication and data transfer.
How do I set up monitoring for my Inverex inverter?
Inverex inverters, based on the Voltronic Axpert VM III platform, offer several ways to monitor their operation and manage settings. While the term "WiFi plug pro" is sometimes used, the manual specifies built-in Bluetooth for mobile monitoring via an app, and a USB port for data logging and firmware updates. This guide details how to set up these communication features.
Diagnosis and Setup Steps
Follow these steps to set up Bluetooth monitoring and USB data logging for your Inverex inverter.
Bluetooth Mobile Monitoring Setup
- Verify Bluetooth Functionality: Ensure your Inverex inverter model has built-in Bluetooth. The Axpert VM III series includes this feature.
- Download the WatchPower App: On your mobile device, go to Google Play and install the "WatchPower" application. This app is designed to communicate with your inverter via Bluetooth.
- Enable Bluetooth on Your Mobile Device: Turn on Bluetooth on your smartphone or tablet.
- Pair with the Inverter: Open the WatchPower app. The app should detect nearby Bluetooth devices. Select your Inverex inverter from the list of available devices to pair. Wireless communication is possible up to 6 to 7 meters in an open space.
- Monitor Inverter Status: Once paired, you can use the WatchPower app to monitor real-time data, such as battery status, PV input, and load output.
USB Data Logging and Firmware Update Setup
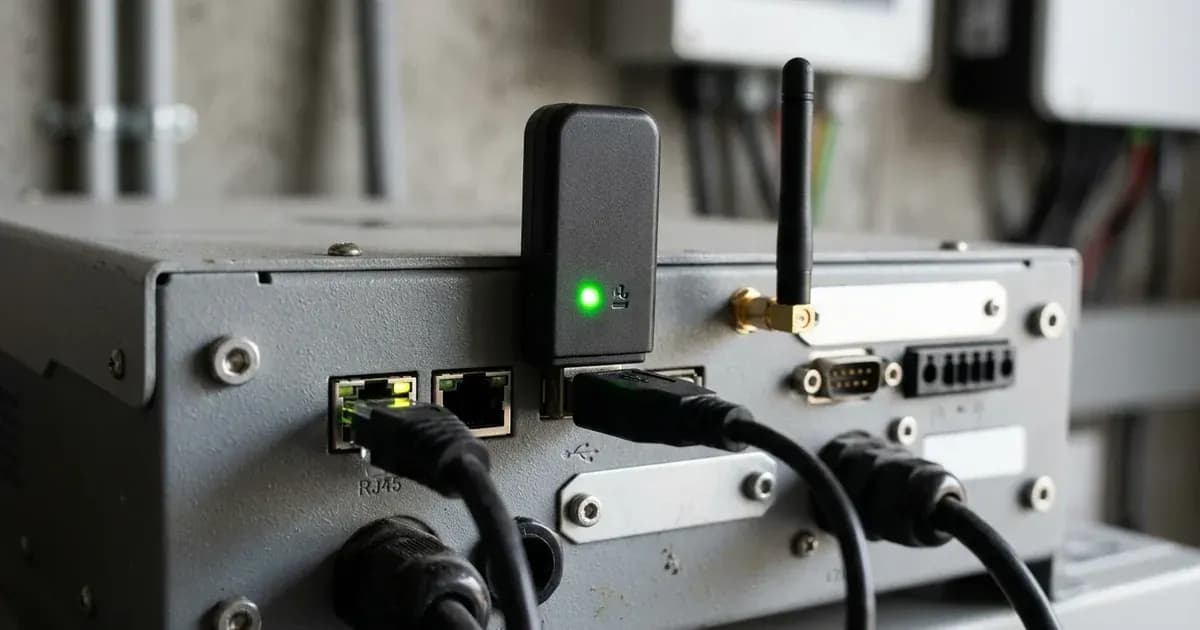
- Locate the USB Port: Identify the OTG USB port on your Inverex inverter.
- Connect a USB Device: For data logging or firmware updates, connect a compatible USB storage device (e.g., a USB flash drive) to the OTG USB port.
- Access Data Logging/Firmware Functions: The OTG USB function is used for firmware upgrade, data log export, re-write internal parameters. Consult your inverter's LCD display and menu settings to initiate these functions. For example, Program 94 allows you to set the data log stored period, with options such as 3, 5, 10, 20, 30, or 60 days, with 10 days as the default. Program 93 allows you to erase all data logs.
- Export Data Logs: Follow the on-screen instructions on the inverter's LCD to export data logs to the connected USB device.
- Perform Firmware Upgrades: If a firmware upgrade is necessary, place the firmware file on the USB device and follow the inverter's instructions for updating.
RS232 and BMS Communication Setup
- RS232 for PC Connection: The inverter includes an RS232 communication port. Use the supplied communication cable and software CD to connect the inverter to a PC for monitoring and configuration.
- BMS Communication: For advanced battery management systems, the inverter features a reversed communication port for BMS (RS485, CAN-BUS, RS232). This allows for closed-loop communication with compatible BMS units.
Cause/fix table for communication issues
Symptom detail | Likely cause | Fix |
|---|---|---|
Cannot find inverter via Bluetooth | Bluetooth not enabled on mobile, inverter out of range, or app issue. | Ensure Bluetooth is on, move closer to the inverter (within 6-7m), restart the WatchPower app. |
WatchPower app not connecting | Inverter not paired, or app permissions. | Re-attempt pairing in the app. Check mobile device app permissions for Bluetooth. |
USB device not recognized | Incompatible USB format, faulty USB device, or incorrect port. | Ensure USB device is formatted correctly (FAT32 is common). Try a different USB device. Confirm connection to the OTG USB port. |
Data logs not exporting | Insufficient space on USB, or logging disabled. | Check available space on the USB device. Verify Program 94 (Data log stored period) is set to a desired duration, and ensure Program 25 (Record Fault code) is enabled if fault logs are also expected. |
Firmware update fails | Incorrect firmware file, corrupted file, or power interruption. | Ensure the firmware file is correct for your model and not corrupted. Do not interrupt power during the update process. |
RS232 connection issues | Incorrect cable, driver issues, or software configuration. | Use the supplied RS232 cable. Install necessary drivers for the communication software. Verify software settings match inverter. |
Communication Settings
The Inverex inverter (Axpert VM III platform) provides several programmable settings related to data logging and alarms, which can be accessed via the LCD panel. Remember that menu/program NUMBERING can differ by model and firmware on rebadged units. Readers must match settings by NAME rather than by number.
Setting Name | Values / Description |
|---|---|
Program 18: Alarm control | "Alarm on" (default) or "Alarm off" to control audible alarms. |
Program 19: Auto return to default display screen | "Return to default display screen" (default) or "Stay at latest screen". |
Program 20: Backlight control | "Backlight on" (default) or "Backlight off". |
Program 22: Beeps while primary source is interrupted | "Alarm on" (default) or "Alarm off" for interruption alerts. |
Program 25: Record Fault code | "Record enable" (default) or "Record disable" for fault logging. |
Program 93: Erase all data log | "Not reset" (Default) or "Reset" to clear stored data. |
Program 94: Data log stored period | Options: 3, 5, 10 (default), 20, 30, 60 days. |
Program 95: Time setting – Minute | Range: 00 to 59. |
Program 96: Time setting – Hour | Range: 00 to 23. |
Program 97: Time setting – Day | Range: 00 to 31. |
Program 98: Time setting – Month | Range: 01 to 12. |
Program 99: Time setting – Year | Range: 17 to 99. |
These settings allow you to customize how your inverter logs data, displays information, and alerts you to events.
Safety: Electrical Connections and Data Integrity
When working with your Inverex inverter, especially when connecting communication cables or USB devices, always prioritize safety.
- Metal Tools near Batteries: Be very cautious when working with metal tools on or around batteries. A potential risk exists to drop a tool to spark or short circuit batteries or other electrical parts and could cause an explosion.
- Qualified Personnel: Only qualified personnel can install this device with battery.
- Data Integrity: Ensure your USB device is reliable and properly formatted before exporting data logs or performing firmware updates. Interrupting a firmware update can render the inverter inoperable.
When to call a technician instead
While setting up monitoring and data logging is generally a straightforward process, some situations warrant professional assistance:
- Persistent Communication Failures: If you cannot establish communication via Bluetooth, USB, or RS232 after following all troubleshooting steps.
- Inverter Malfunction: If the inverter displays fault codes unrelated to communication setup, or if its operation becomes unstable after attempting setup.
- Internal Component Issues: If the manual's troubleshooting section suggests returning the unit to a repair center for fault codes like 01 (Fan is locked when inverter is off), 08 (Bus voltage is too high), 09 (Bus soft start failed), 51 (Over current or surge), 52 (Bus voltage is too low), 53 (Inverter soft start failed), 55 (Over DC voltage in AC output), or 57 (Current sensor failed).
- Warranty Concerns: If you are unsure about any step or fear voiding your warranty, contact a certified technician or the Inverex service center. The manual does not provide specific warranty terms.
Still showing the fault? Book a technician
If the steps above did not clear it, tell us the inverter or battery and the exact code. We pass it to a technician who covers your city; visit charges are quoted before they come.
How this pays for the site: the technician or verifier pays SolarNevs a fixed introduction fee. Nobody pays to be recommended, and you are free to use our free guides instead.
Frequently asked questions
Does the Inverex inverter have WiFi connectivity?
Based on the Axpert VM III manual, Inverex inverters feature built-in Bluetooth for mobile monitoring. The manual does not detail integrated Wi-Fi or a specific 'WiFi plug pro' accessory.
What app is used for mobile monitoring of Inverex inverters?
The 'WatchPower' app, available on Google Play, is used for mobile monitoring of Inverex inverters via their built-in Bluetooth.
What is the maximum range for Bluetooth monitoring?
Wireless communication via the built-in Bluetooth is possible up to 6 to 7 meters in an open space.
What is the USB port on the Inverex inverter used for?
The OTG USB function on the Inverex inverter is used for firmware upgrade, data log export, re-write internal parameters.
Can I connect a Battery Management System (BMS) to my Inverex inverter?
Yes, the Inverex inverter has a reversed communication port for BMS (RS485, CAN-BUS, RS232).
References
- Axpert VM III Manual — accessed 23 August 2026
Related guides
More from inverter errors & fixes.