Solis Inverter Low or No PV Generation: Diagnosis and Fixes
Updated 7 September 2026 · By SolarNevs Research Desk, Dealer surveys + verified sources · 1 source · Method ↗
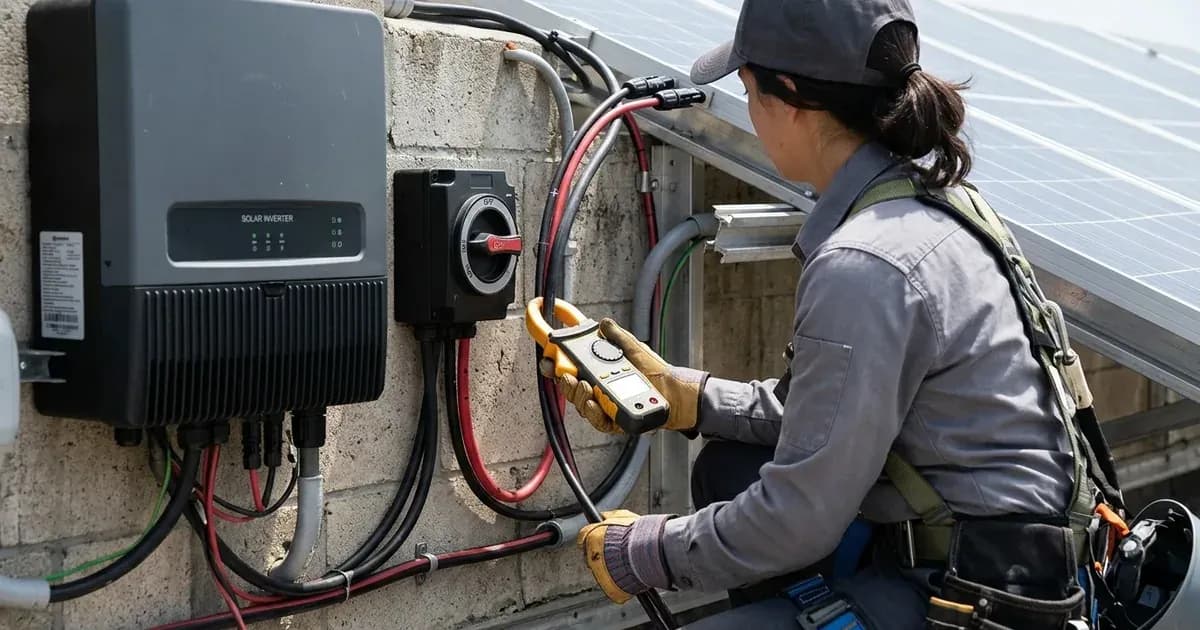
Key Takeaways
- Low or no PV generation on a Solis S5-EH1P-L inverter is often caused by grid instability, PV array issues, or internal inverter protection mechanisms.
- The first step in troubleshooting is always to check the inverter's LCD screen for active fault codes.
- Never open the inverter casing. Wait at least 5 minutes after disconnecting all power sources (PV, grid, battery) before touching any internal components.
- If the inverter displays internal hardware faults, persistent grid issues, or PV ground faults, contact a qualified technician.
Why is my Solis inverter showing low or no PV generation?
If your Solis S5-EH1P-L hybrid inverter is producing less power than expected or no power at all, the most common causes are issues with the grid connection, problems within the PV array, or the inverter limiting its output due to internal or external conditions. Start by checking the inverter's LCD display for any specific fault codes, as these will guide your troubleshooting.
Diagnosis
Follow these steps to diagnose why your Solis inverter is experiencing low or no PV generation.
- Check the Inverter Display for Fault Codes:
- Observation: The inverter's LCD screen shows a fault code (e.g.,
LmtByFreq,OV-DC01,NO-Grid). - Meaning: Specific codes pinpoint the exact issue. Refer to the "Cause/fix table" below for detailed explanations and initial troubleshooting steps.
- Action: Note the code and proceed to the relevant section in the table.
- Observation: The inverter's LCD screen shows a fault code (e.g.,
- Inspect PV Array Connections and Condition:
- Observation: No fault codes related to PV input, but generation is low. Visually inspect solar panels and wiring.
- Meaning: Damaged panels, shading, loose connections, or ground faults can reduce PV input.
- Action: Check for visible damage, excessive shading, or loose PV cable connections. If you suspect a PV ground fault (e.g.,
PV ISO-PRO01orPV ISO-PRO02), do not attempt to fix it yourself.
- Verify Grid Connection and Stability:
- Observation: Inverter displays grid-related fault codes (e.g.,
NO-Grid,OV-G-V04,UN-G-F01) or generation stops when the grid is unstable. - Meaning: The inverter disconnects from the grid or limits output if grid voltage or frequency is outside acceptable ranges, as required by local safety regulations.
- Action: Check your main electrical panel for tripped breakers. Confirm with your utility provider if there are known grid issues in your area.
- Observation: Inverter displays grid-related fault codes (e.g.,
- Check Environmental Factors:
- Observation: Inverter displays
LmtByTemporUN-TEMfault codes, or the inverter feels excessively hot/cold. - Meaning: The inverter may limit output due to over-temperature protection or cease operation in extremely low temperatures.
- Action: Ensure the inverter's ventilation openings are clear and not obstructed. Verify that the installation environment meets the recommended temperature ranges. The surface temperature of the inverter can reach up to 75℃ (167℉) during operation.
- Observation: Inverter displays
- Review Inverter Settings:
- Observation: Inverter displays
LmtByEPM,LmtByDRM,LmtByVg, orLmtByVar. - Meaning: These codes indicate that the inverter's output is being intentionally limited by an external power meter (EPM), Demand Response Management (DRM) function, or grid-support modes (Volt-Watt/Volt-Var).
- Action: If these settings were not intentionally configured, consult your installer or technician. Accessing advanced settings requires a password (
0010) and should only be done by authorized personnel, as improper operation may result in abnormal results and damage to the inverter. Unauthorized access may void the warranty.
- Observation: Inverter displays
Cause/fix table
This table outlines common symptoms, their likely causes, and initial troubleshooting steps for low or no PV generation on your Solis S5-EH1P-L inverter.
Symptom detail | Likely cause | Fix |
|---|---|---|
Inverter output power limited | External Power Meter (EPM) control ( | Confirm if an external EPM/meter is preventing reverse current. Verify power setting limits in section 6.6.7 of the manual and check meter readings. |
Inverter output power limited | Demand Response Management (DRM) function active ( | This is normal operation when DRM is active; no action is typically needed. |
Inverter output power limited | Over temperature power limited ( | This is normal operation; the device is protecting itself. Ensure proper ventilation around the inverter. |
Inverter output power limited | Grid frequency power limited ( | This occurs due to local safety regulations triggering Volt-watt mode when grid voltage is high. No action is generally needed. If factory test errors caused this mode, it can be closed in the LCD: Main menu → Advanced Settings → Password 0010 → STD mode settings → Working Mode → Working mode: NULL → Save and exit. NOTE: This function is for authorised technicians only. Improper access and operation may result in abnormal results and damage to the inverter, and unauthorized access may void the warranty. |
Inverter output power limited | The device is in the Volt-Watt mode ( | Similar to |
Inverter output power limited | The device is in the Volt-Var mode of operation ( | Similar to |
Inverter shutdown | External control device ( | Turn on the device in the ON/OFF Setting. |
Inverter output power limited | Under frequency limit ( | This indicates a grid side fault. Restart the device. If the fault persists, contact the manufacturer's customer service. |
No grid connection / Inverter not feeding to grid | Grid frequency exceeds the upper frequency range ( | Confirm if the power grid is abnormal. Check that the AC cable is properly connected. Restart the system. |
No grid connection / Inverter not feeding to grid | Grid frequency exceeds the lower frequency range ( | Confirm if the power grid is abnormal. Check that the AC cable is properly connected. Restart the system. |
Grid connection issues | Unbalanced grid voltage ( | Restart the system and confirm if the fault continues. |
Grid connection issues | Grid voltage frequency fluctuation ( | Confirm if the power grid is abnormal. Check that the AC cable is properly connected. Restart the system. |
No grid connection / Inverter not feeding to grid | No grid detected ( | Confirm if the power grid is abnormal. Check that the AC cable is properly connected. Restart the system. |
Grid connection issues | Grid transient overvoltage ( | Confirm if the power grid is abnormal. Check that the AC cable is properly connected. Restart the system. |
Grid connection issues | Grid current tracking failure ( | Confirm if the power grid is abnormal. Check that the AC cable is properly connected. Restart the system. |
Grid connection issues | Grid voltage RMS instantaneous overvoltage fault ( | Confirm if the power grid is abnormal. Check that the AC cable is properly connected. Restart the system. |
Grid connection issues | Grid voltage exceeds upper voltage range ( | Confirm if the power grid is abnormal. Check that the AC cable is properly connected. Restart the system. |
Grid connection issues | Grid voltage exceeds lower voltage range ( | Confirm if the power grid is abnormal. Check that the AC cable is properly connected. Restart the system. |
Grid connection issues | On-site grid surge ( | Confirm if the power grid is abnormal. Check that the AC cable is properly connected. Restart the system. |
Fan malfunction | Fan alarm ( | If the fan is externally accessible, visually check for obstructions. Do NOT open the inverter casing or attempt to physically manipulate the fan. Internal fan issues are NOT user-serviceable. High voltages are present, and capacitors can store dangerous energy for several minutes after power disconnection. Opening the inverter without authorization will void the warranty. This requires diagnosis and repair by a qualified and authorized service technician. |
PV input protection | DC 1 input overvoltage ( | Check if the PV voltage is abnormal. Restart the system. |
PV input protection | DC 2 input overvoltage ( | Check if the PV voltage is abnormal. Restart the system. |
Internal fault | DC bus overvoltage ( | Restart the system. |
Internal fault | DC bus undervoltage ( | Restart the system. |
Internal fault | DC bus unbalanced voltage ( | Check if the DC wires are connected correctly without loose connection. |
Internal fault | Abnormal detection of DC bus voltage ( | Check if the DC wires are connected correctly without loose connection. |
Internal fault | DC hardware overcurrent ( | Restart the system. |
Internal fault | A phase RMS value overcurrent ( | Confirm that the grid is abnormal. Confirm that the AC cable connection is not abnormal. Restart the system. |
Internal fault | DC 1 average overcurrent ( | Restart the system. |
Internal fault | DC 2 average overcurrent ( | Restart the system. |
Internal fault | AC hardware overcurrent ( | Confirm that the grid is abnormal. Confirm that the AC cable connection is not abnormal. Restart the system. |
Internal fault | The current DC component exceeds the limit ( | Restart the system. |
Internal fault | IGBT overcurrent ( | Restart the system. |
Internal fault | Module over temperature ( | Check whether the surrounding environment of the inverter has poor heat dissipation. Confirm whether the product installation meets the requirements. |
Internal fault | Low temperature protection ( | Check the working environment temperature of the inverter. Restart the system. |
PV system fault | PV negative ground fault ( | A PV ISO-PRO fault indicates a serious electrical hazard. Immediately isolate the PV array using the DC switch, but ONLY if the DC current is below 0.5A. If the current is above 0.5A, wait for solar irradiance to reduce until the current decreases to below 0.5A before operating the DC switch. Do NOT attempt to troubleshoot or fix this yourself. High DC voltages are present. This requires immediate attention from a qualified technician to prevent electrical hazards and avoid voiding your warranty. Contact a professional. |
PV system fault | PV positive ground fault ( | A PV ISO-PRO fault indicates a serious electrical hazard. Immediately isolate the PV array using the DC switch, but ONLY if the DC current is below 0.5A. If the current is above 0.5A, wait for solar irradiance to reduce until the current decreases to below 0.5A before operating the DC switch. Do NOT attempt to troubleshoot or fix this yourself. High DC voltages are present. This requires immediate attention from a qualified technician to prevent electrical hazards and avoid voiding your warranty. Contact a professional. |
Internal fault | 12V undervoltage failure ( | Restart the system. |
Leakage current fault | Leakage current failure ( | Check current leakage to ground. Verify your grounding. Verify all wires are in good condition and not leaking current to ground. |
Leakage current fault | Leakage current sensor failure ( | Check current leakage to ground. Verify your grounding. Verify all wires are in good condition and not leaking current to ground. |
Grid connection issues | Power grid disturbance ( | Confirm whether the grid is seriously distorted. Check whether the AC cable is connected reliably. |
Internal fault | Relay failure ( | Restart the system. |
Internal fault | LLC hardware overcurrent ( | Check whether the backup load is overloaded. Restart the system. |
Internal fault | Master-slave DSP communication abnormal ( | Restart the system. |
AFCI fault | AFCI self-test failure ( | Verify connections are tight within your PV system. Arc fault settings can be changed in advanced settings if necessary, but this is for technicians only. |
AFCI fault | AFCI failure ( | Verify connections are tight within your PV system. Arc fault settings can be changed in advanced settings if necessary, but this is for technicians only. |
Internal fault | AD zero drift overlink ( | Restart the system. |
PV-side checks vs. Grid-side checks vs. Inverter-side checks
When your Solis S5-EH1P-L inverter is generating low or no power, the problem can originate from the solar panels and their connections to the inverter (PV-side), the electrical grid (Grid-side), or the inverter itself (Inverter-side).
PV-side checks
These checks focus on the solar panels and their connections to the inverter.
- Visual Inspection: Look for physical damage to panels, heavy shading, or debris.
- Connection Integrity: Ensure all DC cables from the PV array are securely connected to the inverter's PV input terminals. Loose connections can lead to reduced power or intermittent generation.
- PV Input Overvoltage: If the inverter displays
OV-DC01orOV-DC02, the voltage from the PV string is too high. This can happen if too many panels are wired in series for the inverter's specifications. Do NOT attempt to measure or alter PV array wiring yourself, as high DC voltages are present and can be lethal. This requires a qualified technician to assess the PV array design and connections. - PV Ground Faults: Faults like
PV ISO-PRO01(PV negative ground fault) orPV ISO-PRO02(PV positive ground fault) indicate insulation issues or damaged cables in the PV strings. These are serious safety concerns. A PV ISO-PRO fault indicates a serious electrical hazard. Immediately isolate the PV array using the DC switch, but ONLY if the DC current is below 0.5A. If the current is above 0.5A, wait for solar irradiance to reduce until the current decreases to below 0.5A before operating the DC switch. Do NOT attempt to troubleshoot or fix this yourself. High DC voltages are present. This requires immediate attention from a qualified technician to prevent electrical hazards and avoid voiding your warranty. Contact a professional.
Grid-side checks
These checks relate to the stability and connection of the utility grid. The inverter needs a stable grid connection to operate in grid-tied mode and export power.
- No Grid Detected: A
NO-Gridfault means the inverter cannot detect the utility grid. Check your main AC breaker and any external AC disconnects. Confirm with your utility provider if there's a power outage or instability in your area. - Grid Voltage/Frequency Issues: Codes such as
OV-G-V04(Grid voltage exceeds upper voltage range),UN-G-F01(Grid frequency exceeds lower frequency range), orG-PHASE(Unbalanced grid voltage) indicate that the grid parameters are outside the inverter's operational limits. The inverter will disconnect or limit output to protect itself and the grid. These issues usually require intervention from the utility company or an electrician to verify grid quality. - Grid Current Tracking Failure: An
IGFOL-Ffault suggests the inverter is having trouble synchronizing with the grid's current. This may point to grid instability or an internal inverter issue related to grid interaction.
Inverter-side checks
These checks pertain to the inverter's internal operation, settings, and components.
- Output Limiting: Codes like
LmtByEPM,LmtByDRM,LmtByTemp,LmtByFreq,LmtByVg, orLmtByVarindicate that the inverter is intentionally limiting its output. This can be due to external control, internal over-temperature protection, or grid-support functions.LmtByTempis a normal protective measure; ensure adequate ventilation. OtherLmtBycodes may require checking advanced settings, which should only be done by authorized technicians. - Internal Faults: Codes such as
DC-INTF.(DC hardware overcurrent),RelayChk-FAIL(Relay failure),DSP-B-FAULT(Master-slave DSP communication abnormal), or12Power-FAULT(12V undervoltage failure) point to internal hardware malfunctions. These are NOT user-serviceable. Do NOT open the inverter casing. High voltages are present, and capacitors can store dangerous energy for several minutes after power disconnection. Opening the inverter without authorization will void the warranty. These faults require a qualified technician. - Fan Malfunction: A
Fan Alarmindicates an issue with the inverter's cooling fan. If the fan is externally accessible, visually check for obstructions. Do NOT open the inverter casing or attempt to physically manipulate the fan. Internal fan issues are NOT user-serviceable. High voltages are present, and capacitors can store dangerous energy for several minutes after power disconnection. Opening the inverter without authorization will void the warranty. This requires diagnosis and repair by a qualified and authorized service technician.
Safety
Working with solar inverters and electrical systems carries significant risks. Always prioritize safety.
- Qualified Personnel: Operations must be accomplished by a licensed technician or Solis authorized person.
- Electrical Standards: Electrical installations must be done in accordance with local and national electrical safety standards.
- Personal Protective Equipment: Always wear technicians’ gloves during the whole process in case of any electrical hazards.
- Internal Components: Do not touch any inner live parts until 5 minutes after disconnection from the utility grid and the PV input. There is a risk of electric shock from energy stored in capacitors. Do not remove the cover for 5 minutes after disconnecting all power sources.
- Hot Surfaces: The surface temperature of the inverter can reach up to 75℃ (167℉). To avoid risk of burns, do not touch the surface of the inverter while it’s operating.
- PV Array Connection: Do not connect PV array positive (+) or negative (-) to ground, as it could cause serious damage to the inverter.
- DC Reverse Connection: If DC inputs are accidentally reversely connected or the inverter is faulty, it is NOT allowed to turn off the DC switch immediately if the current is above 0.5A. Wait for the solar irradiance to reduce until the current decreases to below 0.5A. Only after the current is below 0.5A are you allowed to turn off the DC switches and disconnect the PV strings. Damages due to wrong operations (DC reverse connection) are not covered in the device warranty.
When to call a technician instead
While some basic troubleshooting can be performed, many issues with the Solis S5-EH1P-L inverter require professional intervention. You should call a qualified technician if:
- Persistent Fault Codes: The inverter displays internal fault codes (e.g.,
DC-INTF.,RelayChk-FAIL,DSP-B-FAULT,12Power-FAULT) that do not clear after a system restart. - PV Ground Faults: Any
PV ISO-PROfault (PV negative or positive ground fault) indicates a serious electrical hazard within your solar array. - Grid Issues Persist: If grid-related faults (
NO-Grid,OV-G-V04,UN-G-F01,G-PHASE) continue even after verifying your main breaker and confirming no utility outages. - Physical Damage: You observe physical damage to the inverter, wiring, or solar panels.
- Advanced Settings: You need to change settings in the "Advanced Settings" menu (password
0010). This function is for authorized technicians only, and improper operation may result in abnormal results, damage to the inverter, and may void the warranty. - Warranty Concerns: If you suspect an issue that may be covered under warranty, but requires opening the inverter or complex diagnostics. Removing the cover without authorization may void the warranty.
Still showing the fault? Book a technician
If the steps above did not clear it, tell us the inverter or battery and the exact code. We pass it to a technician who covers your city; visit charges are quoted before they come.
How this pays for the site: the technician or verifier pays SolarNevs a fixed introduction fee. Nobody pays to be recommended, and you are free to use our free guides instead.
Frequently asked questions
Why is my Solis inverter showing low PV generation?
Low PV generation can be caused by the inverter limiting its output due to grid conditions like high frequency or voltage, or internal over-temperature protection. Check the inverter's LCD for codes like LmtByFreq or LmtByTemp.
What do OV-DC01 or OV-DC02 fault codes mean on my Solis inverter?
These codes indicate a DC input overvoltage on PV string 1 or 2. This means the voltage from your solar panels is too high for the inverter, which can prevent generation.
My Solis inverter displays a PV ISO-PRO fault. What should I do?
A PV ISO-PRO fault indicates a serious electrical hazard. Immediately isolate the PV array using the DC switch, but ONLY if the DC current is below 0.5A. If the current is above 0.5A, wait for solar irradiance to reduce until the current decreases to below 0.5A before operating the DC switch. Do NOT attempt to troubleshoot or fix this yourself. High DC voltages are present. This requires immediate attention from a qualified technician to prevent electrical hazards and avoid voiding your warranty. Contact a professional.
Why is my Solis inverter not generating power even with sunlight?
If your Solis inverter is not generating power despite sunlight, check for 'NO-Grid' or grid-related fault codes like 'OV-G-V04' or 'UN-G-F01'. These indicate grid instability or disconnection, which prevents the inverter from feeding power to the grid.
Can I fix an internal fault code like DC-INTF or RelayChk-FAIL myself?
Internal fault codes such as DC-INTF (DC hardware overcurrent) or RelayChk-FAIL (Relay failure) typically indicate a hardware issue within the inverter. These faults are NOT user-serviceable. Do NOT open the inverter casing. High voltages are present, and capacitors can store dangerous energy for several minutes after power disconnection. Opening the inverter without authorization will void the warranty. These faults require diagnosis and repair by a qualified and authorized service technician.
References
- Solis S5-EH1P(3-6)K-L EUR V1.3 Manual — accessed 23 August 2026
Related guides
More from inverter errors & fixes.